A question I get asked quite often is how to deselect Revit elements (such as Flex Ducts, pipes under 10mm diameter, and so on) that you do not want to be included in automated clash checks in the Model Coordination tool. The easiest way to do that is to create 3D views in Revit and turn off the visibility of those elements. Then include those views in the publish sets.
Here is the procedure for doing that.
1. Inside Revit, create a 3D view. I normally call it Clash Detection View.
2. In this view, turn off the visibility of the elements you do not want to be included in automated clash checks. The image below shows a 3D view with flex ducts turned off in a Mechanical discipline model.

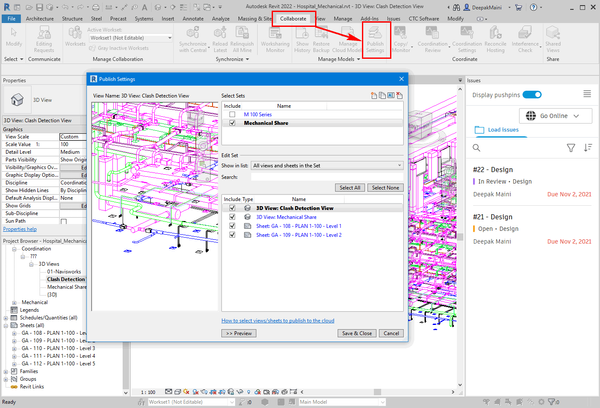
3. From the Collaborate ribbon tab > Manage Models ribbon panel, click Publish Settings.
4. Create a new publish set and make sure you select the check box on the left of the name of that publish set.
5. In this new publish set, include the Clash Detection 3D view. The figure below shows the publish set with the views and sheets I want to share.

6. Save/Sync the model and then publish/upload on the BIM360/ACC project.
7. In the Model Coordination environment, click the Clashes Tool > Active tab > Settings, as shown below:

8. Deselect any 3D view that you do not want to be included in the automated clash checks. In the image below, the Mechanical Share view has been deselected from the Mechanical model. This way, only the Clash Detection View will be used for clash checks.

9. Save settings and then return to the Active tab and notice only the selected views and now used for automated clash checks, as shown below: