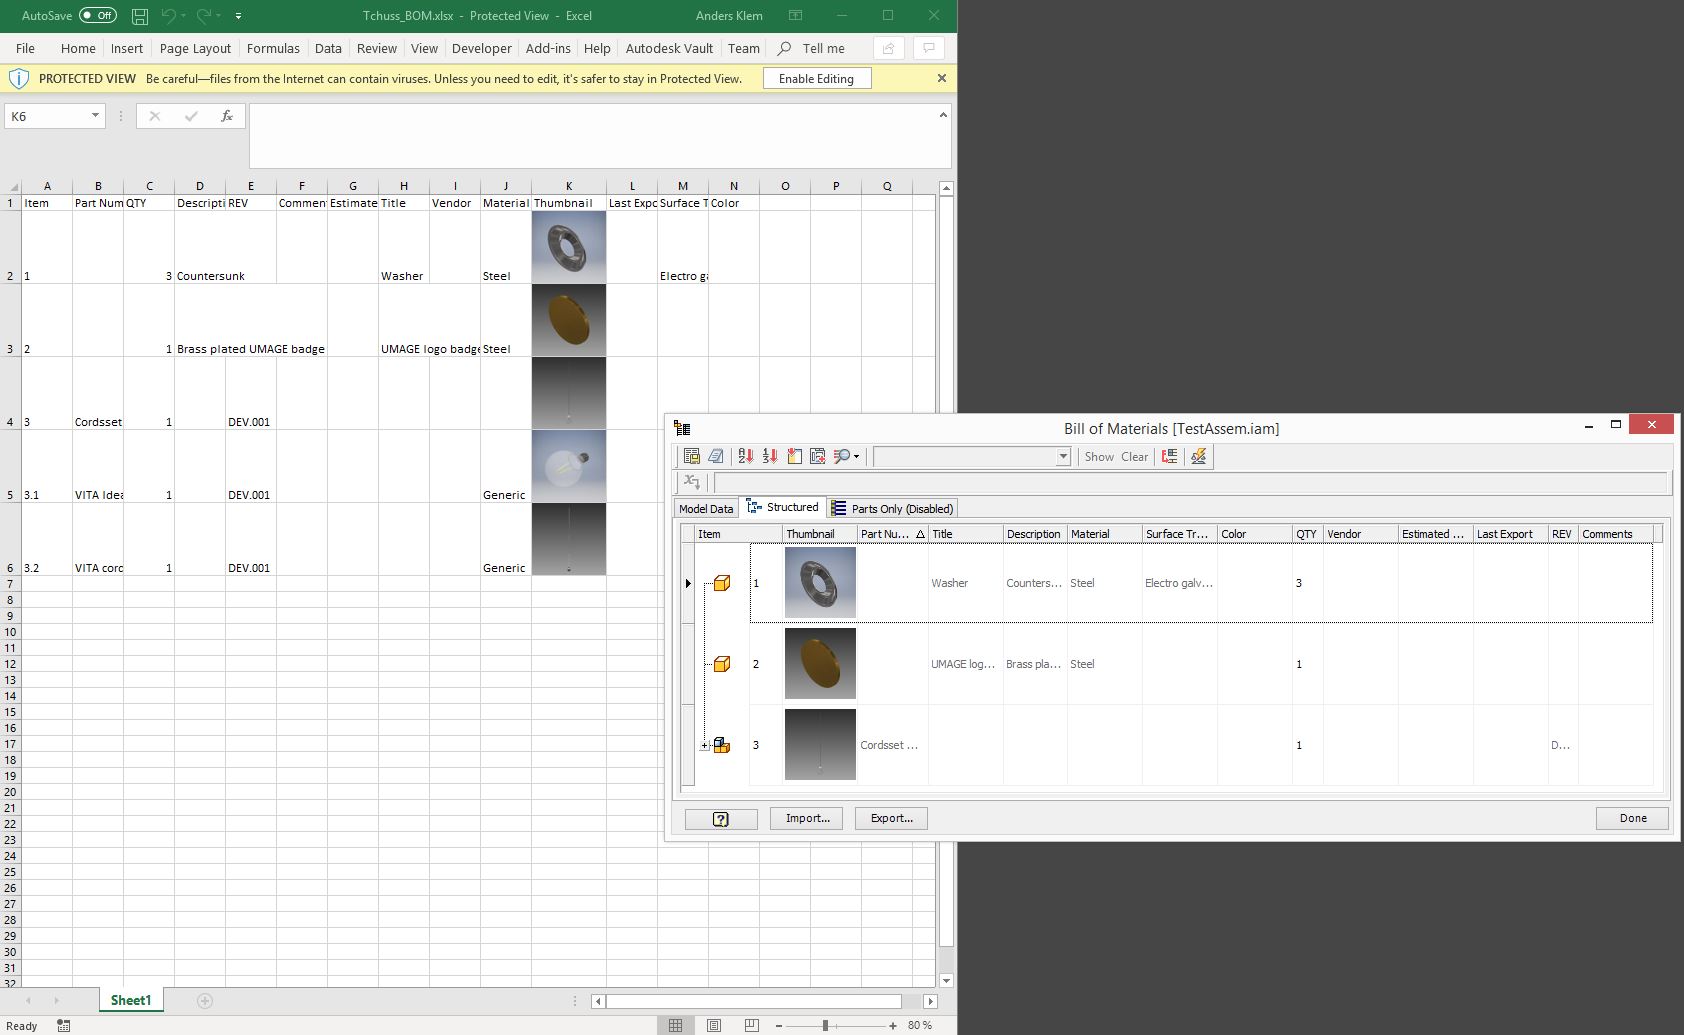
This is another example, export a list to excel with a template, and add thumbnails as comments, to make my list more readable in excel, I found it more appropriate than adding the thumbnail because I unnecessarily enlarged the cells. Care must be taken to load the excel template routes well and where the temporary files are stored.
Sub Main()
On Error Resume Next

Dim Dirtemp As String = "C:\Users\Sergio\AppData\Local\Temp\"     '''Specify the path of the temporary folder
Dim Dirxlsx As String = "E:\Libro1.xlsx"                          ''' Specify the template path
Dim osheetbom As String = "BOM"                                   ''' Specify the sheet of the template

Dim oDoc As AssemblyDocument
oDoc = ThisApplication.ActiveDocument
Dim oBOM As BOM
oBOM = oDoc.ComponentDefinition.BOM
    ' Set the structured view to 'all levels'
oBOM.StructuredViewFirstLevelOnly = False
    ' Make sure that the structured view is enabled.
oBOM.StructuredViewEnabled = True
    ' Make sure that the parts only view is enabled.
oBOM.PartsOnlyViewEnabled = True
    ' Establece el tipo de lista de materiales, estructurado o solo partes

Dim oValueList As New ArrayList
oValueList.Add("Structured")
oValueList.Add("Parts Only")
Dim oValue As String
	oValue = InputListBox("Select the type of List to export", oValueList, "Structured", "iLogic", "Selections Available")

Dim oBOMView As BOMView
oBOMView = oBOM.BOMViews.Item(oValue)
Dim orden As String = InputBox("Sort to", "Exportar BOM", "Part Number")

oBOMView.Sort(orden, True)' Indicar por medio de que factor se ordenara la lista
oBOMView.Renumber(1, 1)

xlApp = CreateObject("Excel.Application")

xlApp.Visible = True
xlWorkbook = xlApp.Workbooks.Open(Dirxlsx)

xlWorksheet = xlWorkbook.Worksheets.Item(osheetbom)
Dim row As Integer
row = 3                 ''' Indicate from which row the copying will start to excel

'Dim bRow As bomRow
bRows = oBOMView.BOMRows
For Each bRow In bRows

Dim rDoc As Inventor.Document'Document
rDoc = bRow.ComponentDefinitions.Item(1).Document

Dim rDocName As String = rDoc.DisplayName

Dim m_Camera As Inventor.Camera
m_Camera = ThisServer.TransientObjects.CreateCamera()
If rDoc.DocumentType = kPartDocumentObject Then
  m_Camera.SceneObject = DirectCast(rDoc, PartDocument).ComponentDefinition
Else
  m_Camera.SceneObject = DirectCast(rDoc, AssemblyDocument).ComponentDefinition
End If
m_Camera.Perspective = True

Dim m_TO As Inventor.TransientObjects
m_TO = ThisApplication.TransientObjects

m_Camera.ViewOrientationType = Inventor.ViewOrientationTypeEnum.kIsoTopLeftViewOrientation
m_Camera.Fit
m_Camera.ApplyWithoutTransition

ThisApplication.DisplayOptions.NewWindowDisplayMode = DisplayModeEnum.kShadedWithEdgesRendering
ThisApplication.DisplayOptions.Show3DIndicator = False

Dim TumbFilename As String = Dirtemp & rDocName & ".bmp"

m_Camera.SaveAsBitmap(TumbFilename, 800, 600, m_TO.CreateColor(255,255,255))


Dim docPropertySet As PropertySet
docPropertySet = rDoc.PropertySets.Item("Design Tracking Properties")

'Se seleccionan las columnas de tabla que se exportaran al archivo excel asi como su ubicacion

xlWorksheet.Range("A" & row).Value = bRow.ItemQuantity
xlWorksheet.Range("B" & row).Value = docPropertySet.Item("Part Number").Value
xlWorksheet.Range("C" & row).Value = docPropertySet.Item("Description").Value


With xlWorksheet.Range("B" & row)
            .AddComment
            .Comment.Visible = False
			.Comment.Text(rDocName)
            .Comment.Shape.Fill.UserPicture(TumbFilename)
            .Comment.Shape.Height = 150
            .Comment.Shape.Width = 150
End With
'xlWorksheet.Range("A" & row).Value = bRow.ItemNumber
'xlWorksheet.Range("E" & row).Value = docPropertySet.Item("Cost").Value
'xlWorksheet.Range("F" & row).Value = docPropertySet.Item("Stock number").Value
'xlWorksheet.Range("G" & row).Value = docPropertySet.Item("Vendor").Value

row = row + 1
Next

xlWorksheet.Columns("A:Z").AutoFit

Dim oFileName As String = "Export_" &   oDoc.DisplayName & ".xlsx"
MessageBox.Show(oFileName , "Export to")
xlWorkBook.SaveAs(ThisDoc.Path & "\" & oFileName)'The excel file will be saved in the location of the assembly file
xlWorkbook.Close (True)
xlApp.Quit
 End Sub
By the way your work @HermJan.Otterman opened many ideas was great. I congratulate you!!
Please accept as solution and give likes if applicable.
I am attaching my Upwork profile for specific queries.
Sergio Daniel Suarez
Mechanical Designer
| Upwork Profile | LinkedIn


