Cut length _ From bent pipes & other bent objects

Cut length _ From bent pipes & other bent objects

drawingsCHR7R
Advocate Advocate
3,892 Views
15 Replies
Message 1 of 16

Cut length _ From bent pipes & other bent objects

drawingsCHR7R
Advocate
Advocate

Hi guys,


I wanted to know: Is Inventor able to tell you what the cut length of a bent pipe or Round bar is?

For instance in the attache ipt. the pipe started out straight and was bent, would Inventor be able to give me a cut length of what it was prior to bending?

0 Likes
Accepted solutions (1)
3,893 Views
15 Replies
Replies (15)
Message 2 of 16

mcgyvr
Consultant
Consultant

Not totally.. Most just calculate or measure the neutral axis loop length and use that I believe.

You can get pretty darn close with that. 


-------------------------------------------------------------------------------------------
Inventor 2023 - Dell Precision 5570

Did you find this reply helpful ? If so please use the Accept Solution button below.
Maybe buy me a beer through Venmo @mcgyvr1269
Message 3 of 16

Daan_M
Collaborator
Collaborator

I don't know any UI tool for this, but mabye there is....


Alternatively you could:

- Draw in splines and measure those, since pipe bending goes according to certain standards.

- Make an iLogic code that automates this


Example source:

Pipe bending calculation 

Message 4 of 16

Anonymous
Not applicable
Accepted solution

Here's an idea, if this is a "one off", and you need an accurate length, what about using the sheet metal environment?


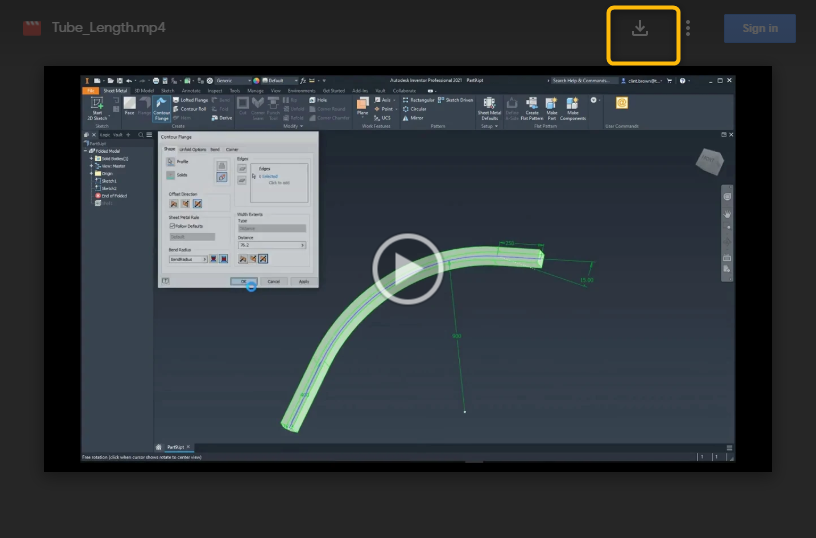
Have a look at my screencast, the idea is to use a simulated square bar to represent the tube, which you then flatten, it should be quite accurate.


https://knowledge.autodesk.com/community/screencast/1eb8ee9b-dd75-406d-b82b-6702b7944a28

(for some reason the sound did not come through, but you can follow along on the video)

Message 5 of 16

johnsonshiue
Community Manager
Community Manager

Hi! The closest thing in Inventor is flat pattern or unfold in sheet metal. But, it may not apply to round tube. You may be able to approximate it using Unwrap in 2020 or later.

Many thanks!


Johnson Shiue (johnson.shiue@autodesk.com)
Software Test Engineer
Message 6 of 16

johan.degreef
Advisor
Advisor

@drawingsCHR7R 

Would added part be a solution for you?

Inventor 2025, Vault Professional 2025, Autocad Plant 3D 2025
0 Likes
Message 7 of 16

drawingsCHR7R
Advocate
Advocate

I see, could you please elaborate further on what the neutral axis loop length is?

I have an idea of what it is but I am not too sure.

0 Likes
Message 8 of 16

drawingsCHR7R
Advocate
Advocate

My normal methodology would be to use the arc length command in an idw. I will see about the workflow suggested and try it our. Thanks for the suggestion.

0 Likes
Message 9 of 16

drawingsCHR7R
Advocate
Advocate

@Anonymous I absolutely love this. definitely going to be using this. Thanks a lot!!

Message 10 of 16

drawingsCHR7R
Advocate
Advocate

@Anonymous I'm not too sure how to download the screencast. Would love to have it for future reference. How can I download it? 

0 Likes
Message 11 of 16

drawingsCHR7R
Advocate
Advocate

Unfortunately not, but thank you for the attempt

0 Likes
Message 12 of 16

Anonymous
Not applicable
Message 13 of 16

LT.Rusty
Advisor
Advisor

Frame generator will do it quite easily for you right out of the box, but depending on what you're ultimately trying to accomplish it may wind up being too cumbersome.


On the other hand, it might also wind up being exactly what you need.


If you open up the zip file, there's a bunch of stuff inside it:


"bent part - FG ass'y.iam" is the main file. 

"bent part FGSK.ipt" is the IPT file with the sketch on which the FG work is based.

The folder is automatically created by frame generator, along with everything inside it.


Open up the main assembly file, then you can drill down to the actual part that was created. Look at the parameters, and notice G_L, which stands for GENERATED LENGTH. (There's also B_L, for BASE LENGTH, but ignore that one for now. In this case it's the same as G_L, but in many cases (if not most) it won't be, and that can give you fits later on.)


By default, all these things are displayed in decimal with a ridiculous number of significant figures, but there's ways to fix that and make things show up with a set number of decimal places and / or fractional values. It's not difficult to do, but it is a little time consuming to set up initially, though it will make your life much, much easier in the long term if you're pulling G_L into drawings or part numbers or anything like that.


If these are standardized angles and bends, you could also create some custom content center parts that would have essentially similar functionality built in.

Rusty

EESignature

Message 14 of 16

drawingsCHR7R
Advocate
Advocate

Thank you, It is essentially not what I had in mind as the work I do doesn't really require FG, but I do use it from time to time, so I will definitelty have a look at your suggestion.


Thank you

0 Likes
Message 15 of 16

dusan.naus.trz
Advisor
Advisor

Hi,
try the file named BAR_UNFOLD.zip, which is in the link. Give feedback if this helps.

https://forums.autodesk.com/t5/inventor-ideas/round-bar-unfold/idi-p/9678931


Message 16 of 16

vyivanchikov
Enthusiast
Enthusiast

You can do it differently, if the profile is simple (round, rectangular... or other). Calculate through volume and area.

What is volume in maths, it is the area multiplied by the height (length).Therefore, from this formula to calculate the length is simply V/S (volume divided by area), which is the length.
In this example: the pipe is 76,2. The wall thickness is 3 mm. Area 689.894 mm2. Volume 1261192.9 mm3.

1261192.9 / 689.894 = 1,828.0965 mm.

Which corresponds to , if you look it up in the drawing, along the centre line.

Conclusion: if you do it through ilogic, introduce additional variables: area and volume.

Can be realised with the spring sweep too!

Good luck to all!

0 Likes