Need help closing on a complex curved surface with patch tool

Need help closing on a complex curved surface with patch tool

zachostrosky
Explorer Explorer
1,672 Views
5 Replies
Message 1 of 6

Need help closing on a complex curved surface with patch tool

zachostrosky
Explorer
Explorer

I have been modifying a design for a grip to fit my needs and ascetics but I have been stumped for hours now and have watched a fair few tutorials that don't quite get my problem unfortunately. The problem is closing the part where as it follows a smooth matching curvature of the gap space as drawn in red (sorry for mspaint quality). I have tried to use the patch tool to no success as it gives a sharper geometry than in want with a smooth curve and adding rails makes it sharper or weird all together. Im not sure how I would contour that curve as a surface to patch it up. This is the last step before it is completed. This is a photo of the original product for reference on the shape and curve I'm after
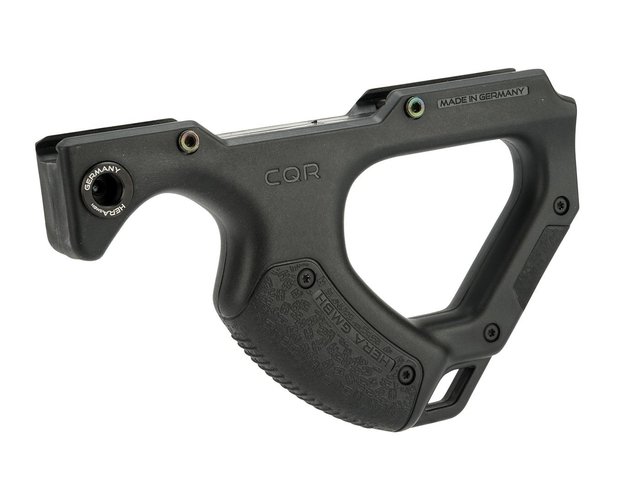
grip4.png

grip1.png

grip3.png

grip2.png


.

0 Likes
Accepted solutions (2)
1,673 Views
5 Replies
Replies (5)
Message 2 of 6

matthewrjacobs
Advocate
Advocate

A couple of thoughts.


1.  think of patch as a sheet,  it will sag when you drape it across something unless you provide a support structure or pull it tight.   so loft may be the better tool here.   


2.  No. 1 aside,  I think you can get it to work with patch.   Select the arc you have drawn in "grip3" picture, and extrude a surface downward.  This is a helper surface>patch command, hide your sketches and uncheck chaining> Select the edge of the helper surface>select the rest of the edges of the hole, only the top half, ( you may need to split the face of the grip in the same plane as the curve in "grip3").> set your edge continuity to G1 or G2,  you may need to play with this. > if this makes a patch you like,   you then need to mirror the patch to the other side.> stich the patches together, but not the helper surface.


A couple of resources,  that might help you,  @TrippyLighting  has a video on the forum for a violin body,  that covers some of this. Also,  YT Austin Shaner, he has some videos for making guitar neck transitions,  which is a similar application

0 Likes
Message 3 of 6

TheCADWhisperer
Consultant
Consultant

Where is your Timeline History?

This edge is pretty rough?

TheCADWhisperer_0-1636470806693.png


0 Likes
Message 4 of 6

matthewrjacobs
Advocate
Advocate

this is upside-down from what I described, but should help.    


matthewrjacobs_0-1636471284331.png


0 Likes
Message 5 of 6

TrippyLighting
Consultant
Consultant
Accepted solution

For models like this I would enable the timeline right after importing the geometry.

This is one of the first posts you've made on the forum so it is hard to judge your experience with modeling in general and surface modeling in particular.

Unless you have some experience in Surface modeling I would lower my expectations as to what you can achieve.


Another reason to lower your expectations is that the input geometry to this already is questionable and many of the edges have terrible curvature problems.


TrippyLighting_0-1636471463106.png


While the surface quality o the patch tool has recently has  substantially improved, it is usually the last resort w

hen 4-sided lofting is not possible.

You will get the best result if you divide such geometry into several lofts.


I'd love to have a chat with the person who modeled the original model. It's pretty terrible!


TrippyLighting_0-1636473143855.png


EESignature

Message 6 of 6

matthewrjacobs
Advocate
Advocate
Accepted solution

I suspect this is closer to what you were looking for,  but Mr. Lighting is correct, the model is pretty bad.  There's something like 17 edges in the patch when there should only be a handful.    I couldn't get the patch to compute if I had any G1 or G2 Continuity enabled.   It's far from great but in the ballpark.


 A couple of deviations from my previous post.  I had to stich the helper surface to the main body,  and I didn't have to split the face.  Also,  with so many edges, chaining helped with the edge selection.


matthewrjacobs_0-1636501633959.png


BTW, nice 2A part.

0 Likes