Announcements

The Autodesk Community Forums has a new look. Read more about what's changed on the Community Announcements board.

Guitar design and manufacture using Fusion 360 and CNC

jeff_strater
Community Manager

Guitar design and manufacture using Fusion 360 and CNC

jeff_strater
Community Manager
Community Manager

Hi Fusion community, (and especially guitar makers),


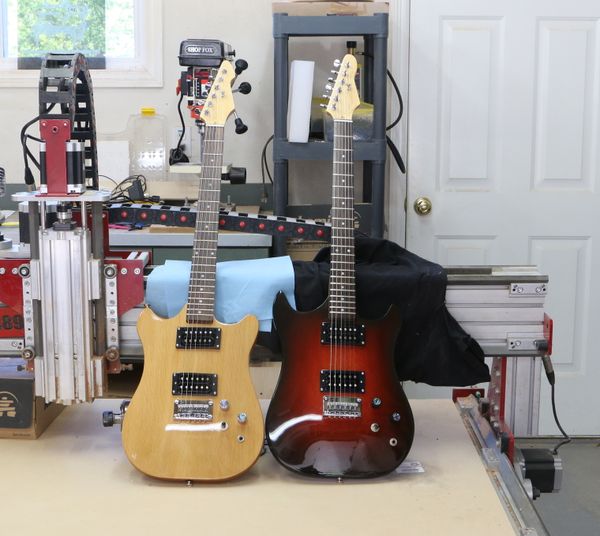
I wanted to let you know that I’ve been working on a cool project with our friends at CNC Router Parts.  As I said way back in October, in this thread, I had started on this project to design and produce a guitar body with Nathan Skalsky, who is part owner of CNC Router Parts.  Rather than my usual modeling projects, which just resulted in a Fusion model, I wanted to approach this with the idea of actually producing a real, physical, playable guitar.  Since then, we’ve been busy in design and implementation.  Since we both have day jobs, it’s taken us a while, but we are finally at a point where we can declare the project done.


In my past guitar making, I’ve always only done completely flat-slab type designs, because it was relatively easy to cut out the shape on a bandsaw from a flat chunk of wood.  But, I’ve always wanted to do a carved top guitar.  I realized that the combination of 3D design in Fusion + CNC for manufacturing would give me a powerful way to explore this type of design.  We are also working on a hollow-body version, which we think will further illustrate the power of CNC + 3D modeling.


We learned a lot.  We made a lot of mistakes along the way:  Everything from mis-measurements of the neck and bridge positions and height to tool path errors to simple human mis-communication of who was making which changes in which order.  We made lots of test runs using cheap wood, each of which revealed things we hadn’t thought of (for instance, that the mounting screws for the bridge can’t go into the control cavity!).  However, we are very happy with the results.  The Fusion model, I think, came out pretty cleanly.  It is fully parametric, and can withstand customization of the outside shape, the carved top shape, etc., and updates without errors.


Here is the model in Fusion:

guitar render 3.png


An early test run using glued-up cheap Home Depot pine:

test run.jpg


After milling:

after milling.jpg


The finished body:

finished body.jpg


And all assembled:

assembled.jpg


Interested in learning more about our workflow, or want to make your own 3D sculpted guitar with Fusion 360?  


Download our Fusion 360 design file from our Thingiverse: 3D Sculpted Electric Guitar project page


Watch our "Design & Make" Videos Walk-throughs:

I’m hoping to start a discussion here about guitar design and building using Fusion.  Feel free to ask any questions, make any comments, etc., and we’ll be happy to respond.


@jeff_strater & @nathan.skalsky


Jeff Strater
Engineering Director
14 Likes
Reply
19,943 Views
34 Replies
Replies (34)

TOwens777
Advocate
Advocate

Jeff, very nice job!!!!  I can totally relate to the process and issues you faced, especially in connection with the neck.

I can't wait to see the hollow body version!


I'm back working on my latest model. I had to sit winter out as I have no heat in my shop as of yet.

I have a nearly completed back and hope to start working on the top in the next couple of weeks or so.

I look forward to comparing notes!


-Tim


0 Likes

nathan.skalsky
Advocate
Advocate

Project Update: I was excited to take one of the guitar's that Jeff and I made to the Bay Area Maker Faire 2016 recently (May 20-22) - the red maple one specifically.  People really liked it and seeing how it was made using Fusion 360 with our new Benchtop CNC machine.  We happened to be making and giving away ukulele's at our booth as a live production shop demo (Makezine - Milling Ukulele's with CNC Router Parts) however we also had a number of open source and customer projects on display (each with a "making of" video loop).  


Guitar shown at 0:20 & 0:35


The minor spoiler here is that this one (right in the picture below) is actually our hollow-body design (great for hardwoods like maple) which we are working towards publishing the sources and how-to videos (simular to what we did for the solid body version in Jeff's post).  It was very helpful to have the "un-joined" machined body top-half so people could hold that and see what the inside of the hollow body looks like and compare to the finished result.  


IMG_7717 copy.JPGScreen Shot 2016-06-04 at 6.09.03 PM.png


Did anyone else in our forum community attend the Bay Area Maker Faire this year and perhaps happen to stop by our booth (CNC Router Parts).   Major bonus points if you got one of the ukuleles!


-Nathan


4 Likes

Anonymous
Not applicable

Wow, it is amazing, Jeff. You should give a brown bag sharing to Fusion team about what you experienced as both a key Fusion architect and a real Fusion user :).


- Feiqi

0 Likes

knightroguitars
Contributor
Contributor

Hey guys! I'm a luthier and I'm slowly getting my Fusion skills up to par. I just wanted to pop in and say hello and thank you for the work you do. I've been enjoying Fusion a lot and I'm excited to eventually use it with a CNC. 


Pioneer 1.png

3 Likes

jeff_strater
Community Manager
Community Manager

Very nice design, @knightroguitars!  I like a lot of what you've done - it's a nice blend of old and new ideas.  I like the single cutaway, but with the squared-off end.  I like the carbon-fiber pickguard, that's a nice touch.  And the idea of having the pickup toggle in between the knobs is a unique variation.


The one thing that we ran into with our design was where to put the output jack.  If you put it along the edge of the body, then you can't use the CNC machine to make the hole for it.  That's why we ended up with it on the front face.  This has the downside, though, of needing an L-shaped cord to be practical to play.  In retrospect, I might have gone with a stat-type angled jack, maybe even on the back.


Keep us informed of your progress.  Nathan and I are planning to do another post sometime soon about our hollow version.  It was definitely an interesting variation of the project.


Jeff


Jeff Strater
Engineering Director
0 Likes

knightroguitars
Contributor
Contributor

Thanks Jeff! I was inspired to pick up Fusion after watching your videos in collaboration with CNC Router Parts, it's been great fun to learn. I'm excited to be a part of this community and have already learned a lot by reading through these forums.


I definitely see what you mean in regard to the output jack. Mine are all on the side, so I know I'd have to drill as a separate step after the CNC work. I do it that way after my normal manual routing now though, so it's not a big concern to me. The whole guitar design/building process is very familiar by now, but 3D modeling and CAM is new territory.


0 Likes

oldtbone55
Collaborator
Collaborator

Hey Jeff, Great work and articles. As a hobbyist whose been making my own guitars the old fashioned way (no CNC) I Ibecame really interested in Fusion because of the possibilities it could provide in making guitars. I've got several projects on the go right now and made my first attempt at a carved top on a CNC machine using some mdf. I only was able to do the rough cutting for now and need to make a second pass using a ball end mill but it came out better than I expected. The project is a hollow body Les Paul type guitar with f holes. I'm also working on an SG type guitar that I have the plans for but am going through some learning pains transferring the plan into Fusion and creating the sketches needed for dimensioning and toolpath creation. Keep up the great work!


Cheers!

0 Likes

mike.mattera
Alumni
Alumni

Impressive work Jeff. 

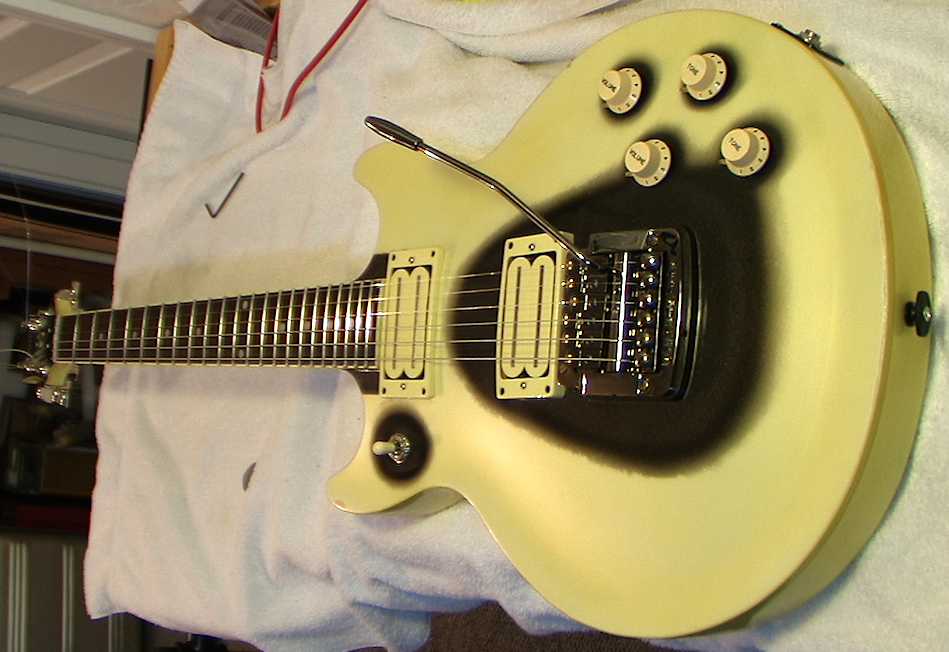
I didn't build this, But I made some pretty serious modifications to a 1982 Ibanez Artist AR100 that I bought is as a project guitar.


As purchased.

No hardware. No Electronics. Just beautiful hand made mahogany body, crafted in Japan during the height of the Japanese guitar revolution.

Pic 1

Pic 2

Pic 3


Milled a flat spot for the pocket.

Pic 1

Milled the pocket,  added a mahogany riser for the Kahler bridge/whammy, lacquered the finish.

Pic 2

Assembled with Pickups and Bridge.

Pic 3

Close up of the Kahler. I dont use the whammy, but I love the fine tuners.

Pic 4


The final product.


It's hard to see, but it's a blackish lacquer with bronze metal flake. Really highlights the Black chrome on the Kahler. 

Not a sunburst. I call it an Eclipse finish.


2 Likes

jeff_strater
Community Manager
Community Manager

very nice @mike.mattera!  You do nice work.  Especially the finish.  That is something I struggle with, a lot.  How do you get such nice results?


Jeff


Jeff Strater
Engineering Director
0 Likes

Anonymous
Not applicable

Hi Jeff / everyone!

A few days ago I stumbled on your video on u-tube while looking for any software to use for future 3d-printer / CNC-guitar builds
so now I'm sitting here, new to fusion 360, with a lot of questions =P

Just wanted to say thanks for the inspiriation and cheers!


Ps.
Here's my take on an PRS style body (I've dubbed it the jCm PMS)
Not pefect nore yet finished, the arched top was done in a few hours of sculpting
and it'll probably need quite a few more...


http://a360.co/2pH3cpA

1 Like

jeff_strater
Community Manager
Community Manager

very nice, @Anonymous.  That is indeed a nice version of a PRS style body.  I like it.


Jeff


Jeff Strater
Engineering Director
0 Likes

oldtbone55
Collaborator
Collaborator

That is a great looking guitar Mike. Really nice finish on it. Is it all mahogany or does it have a maple top? Fender also had Japanese made guitars from that era that were some of the best made guitars they ever built. Keep up the great work!


Cat Very Happy

0 Likes

oldtbone55
Collaborator
Collaborator

Very well done! Really nice take on the PRS. Looks like you've gotten a good handle on Fusion.


Keep it up and keep us posted!


Robot Very Happy

0 Likes

Anonymous
Not applicable

Thx 😃

I just rebooted the whole model and started from scratch... again
Learning from mistakes and trying to keep from repeating them 😉

The new version is up as a shared project/model if you are interestred 😃


Cheers! jCm/dclxviii


PS. sorry for hijacking your thread Jeff

0 Likes

oldtbone55
Collaborator
Collaborator

Oh boy, I know exactly what you're talking about. I can't count the number of times I started over but, you know you really don't learn if you're not making mistakes. I've finally been able to get some test bodies done in pine. I'll post pictures soon.


Keep it going!

2 Likes

oldtbone55
Collaborator
Collaborator

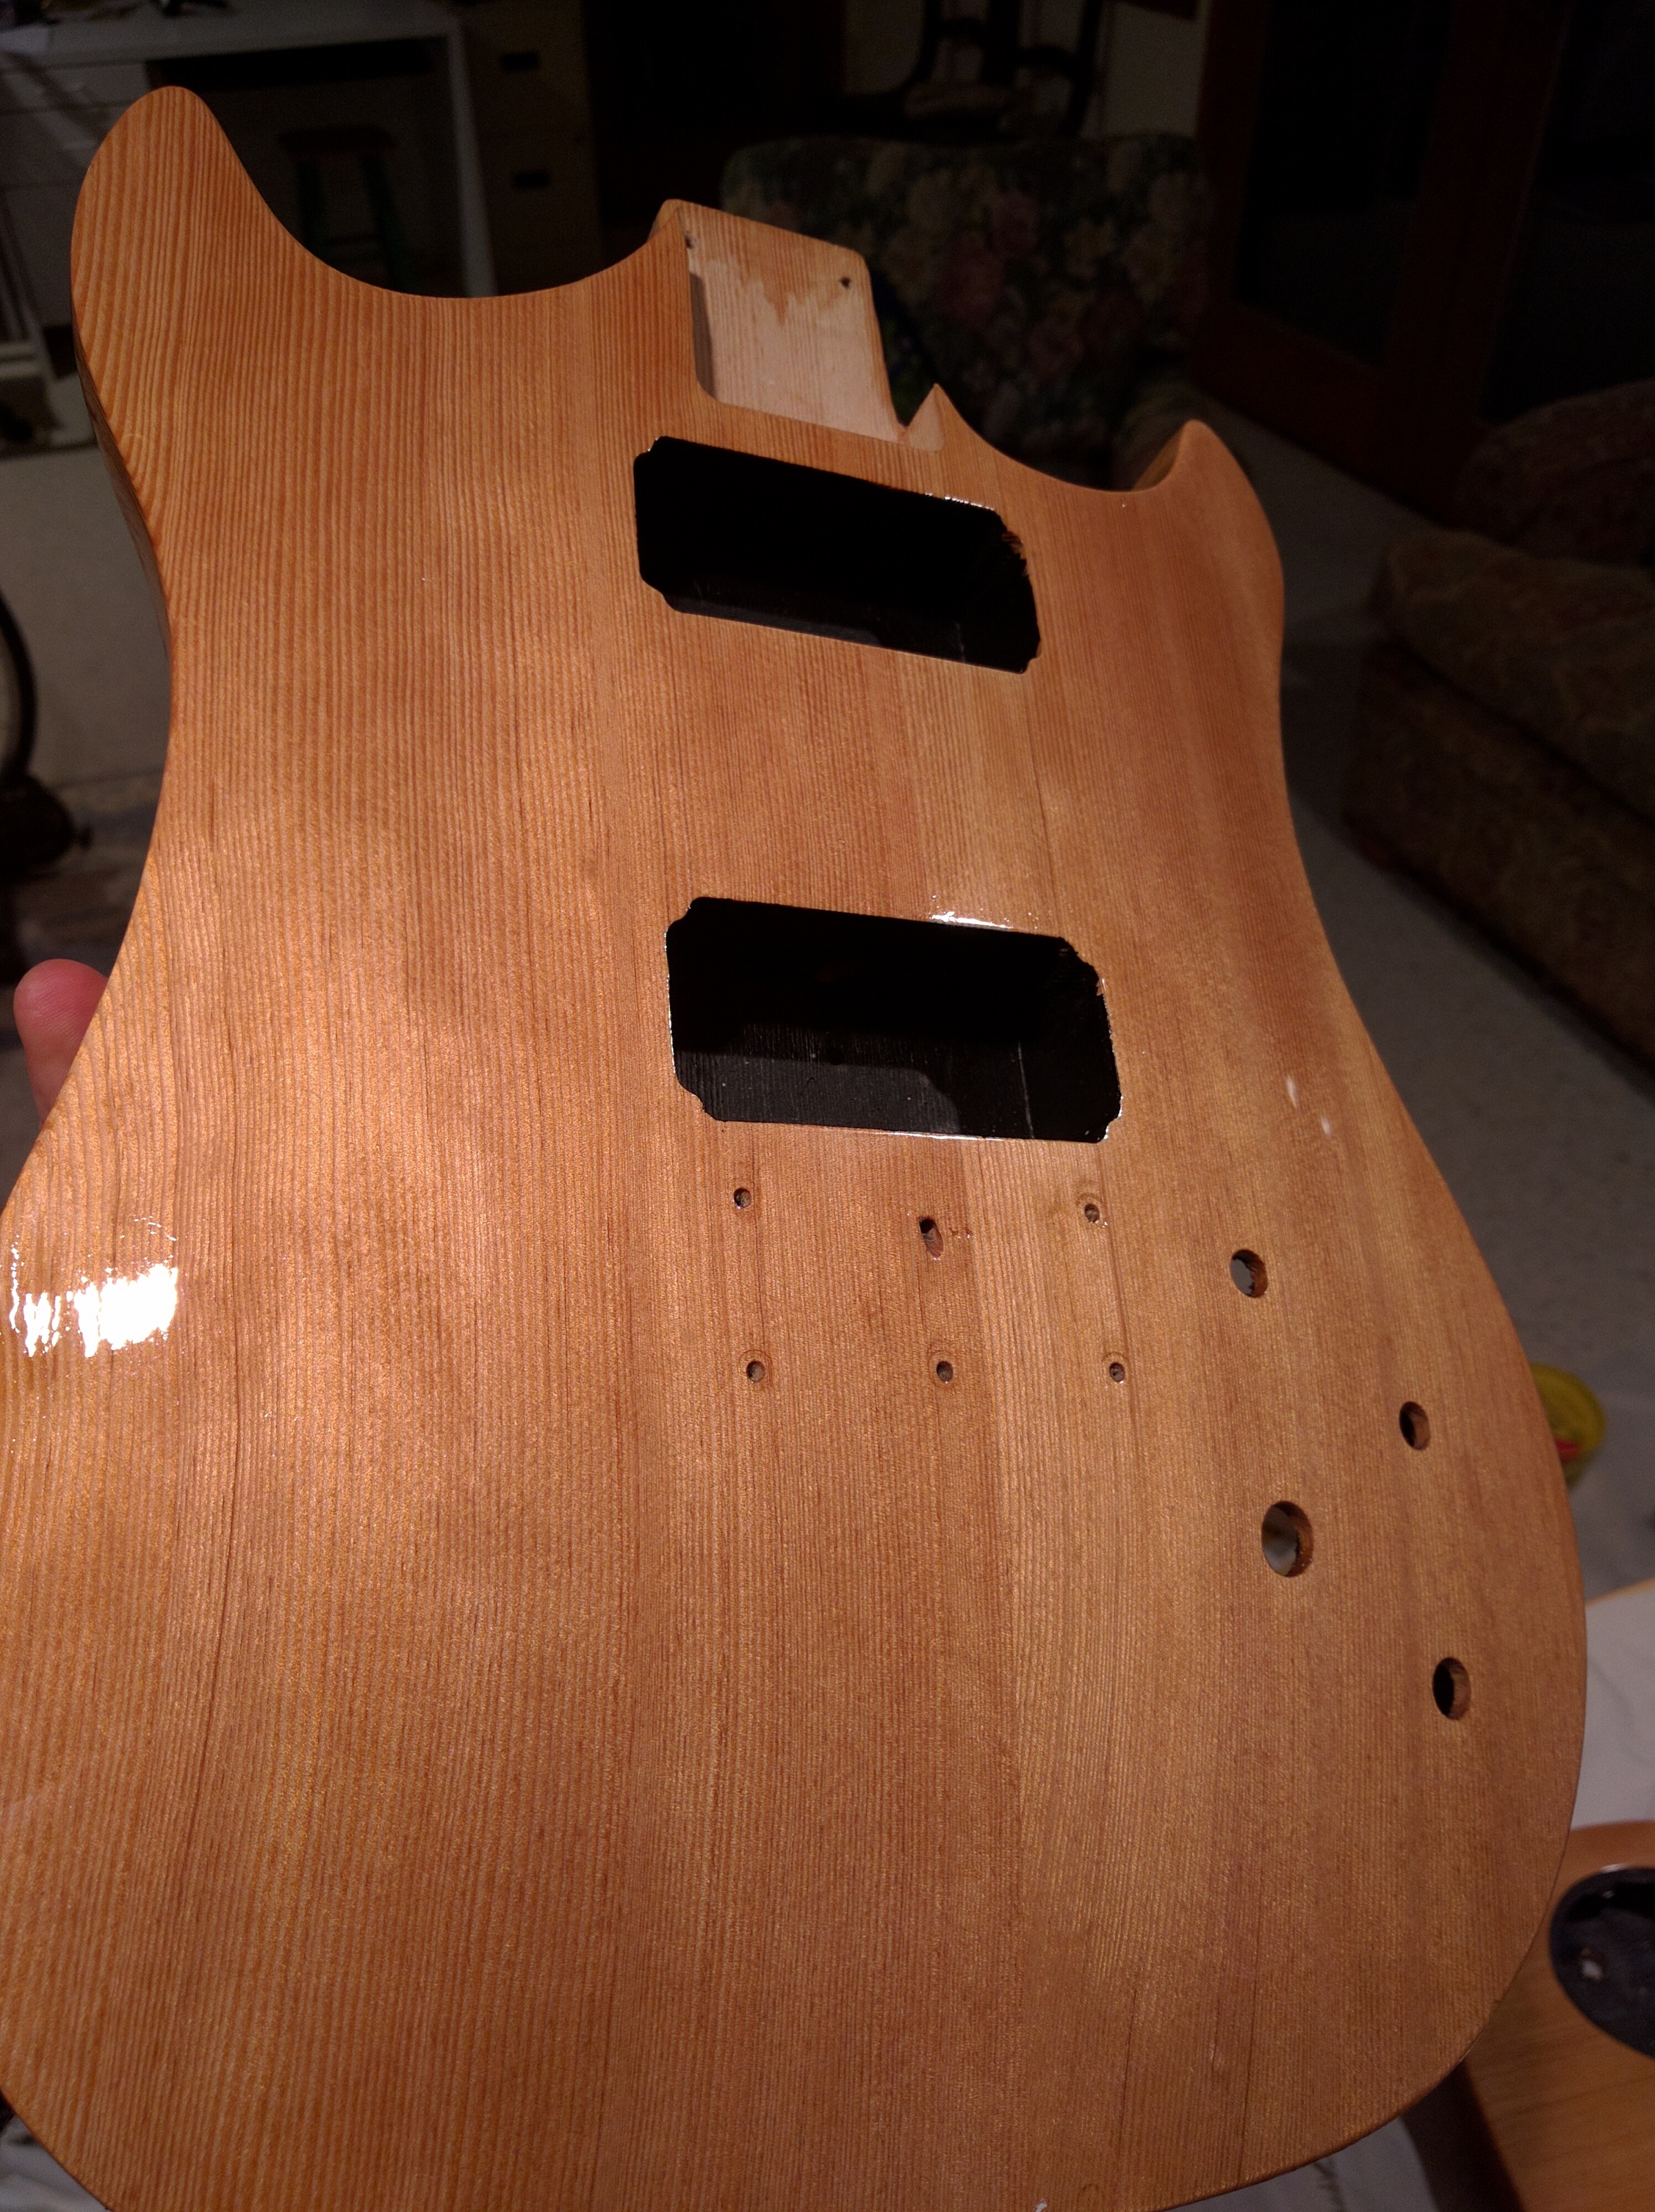
Hi All, finally got done working on my test bodies and made the real thing. The help I received on the Forum especially from Daniel Lyall, Peter Doering and Jeff from Liberty Machine was amazing. I couldn't have done it without them. I also want to give thanks to all of the other members who chipped in as I would be remiss if I didn't mention them. I can't believe I was actually able to make this guitar. I've attached picture of the test bodies and the finished body of one of the guitars I'm working on as well as the test body and top for another guitar. I haven't cut this one on my good material yet but will post pictures when I do. I haven't been able to find someone with a good enough band saw to cut the top material to make the bookmatched top.


Thanks to you all for making this such a great learning experience as well as a lot of fun.

IMG_20170507_130603.jpg


IMG_20170507_130553.jpg


IMG_20170507_130544.jpg


IMG_20170507_130535.jpg


IMG_20170507_135124.jpg


IMG_20170507_135138.jpg


IMG_20170507_135152.jpg


IMG_20170507_135200.jpg


IMG_20170507_111438.jpg


IMG_20170507_111453.jpg


IMG_20170507_111507.jpg


IMG_20170507_111516.jpg


6 Likes

jeff_strater
Community Manager
Community Manager

That looks fantastic!  Please keep updating with pictures as you progress.  It's fun to see these come together.


Jeff


Jeff Strater
Engineering Director
0 Likes

Anonymous
Not applicable

 Hi there, I was just wondering where I could find this 3D file for the PRS. I love the design and would love to use it.


Nicolai

0 Likes

Anonymous
Not applicable

I was planning to do the exact same thing, and be done by September with the first one... I guess I'm not the first to think of this.

1 Like