Community
- Forums Home
- >
- Fusion Community
- >
- Design, Validate & Document forum
- >
- Finished Guitar!!!
Fusion Design, Validate & Document
Stuck on a workflow? Have a tricky question about a Fusion (formerly Fusion 360) feature? Share your project, tips and tricks, ask questions, and get advice from the community.
Turn on suggestions
Auto-suggest helps you quickly narrow down your search results by suggesting possible matches as you type.
Reply
Topic Options
- Subscribe to RSS Feed
- Mark Topic as New
- Mark Topic as Read
- Float this Topic for Current User
- Bookmark
- Subscribe
- Printer Friendly Page
Message 1 of 27
09-30-2015
04:55 PM
- Mark as New
- Bookmark
- Subscribe
- Mute
- Subscribe to RSS Feed
- Permalink
- Report
09-30-2015
04:55 PM
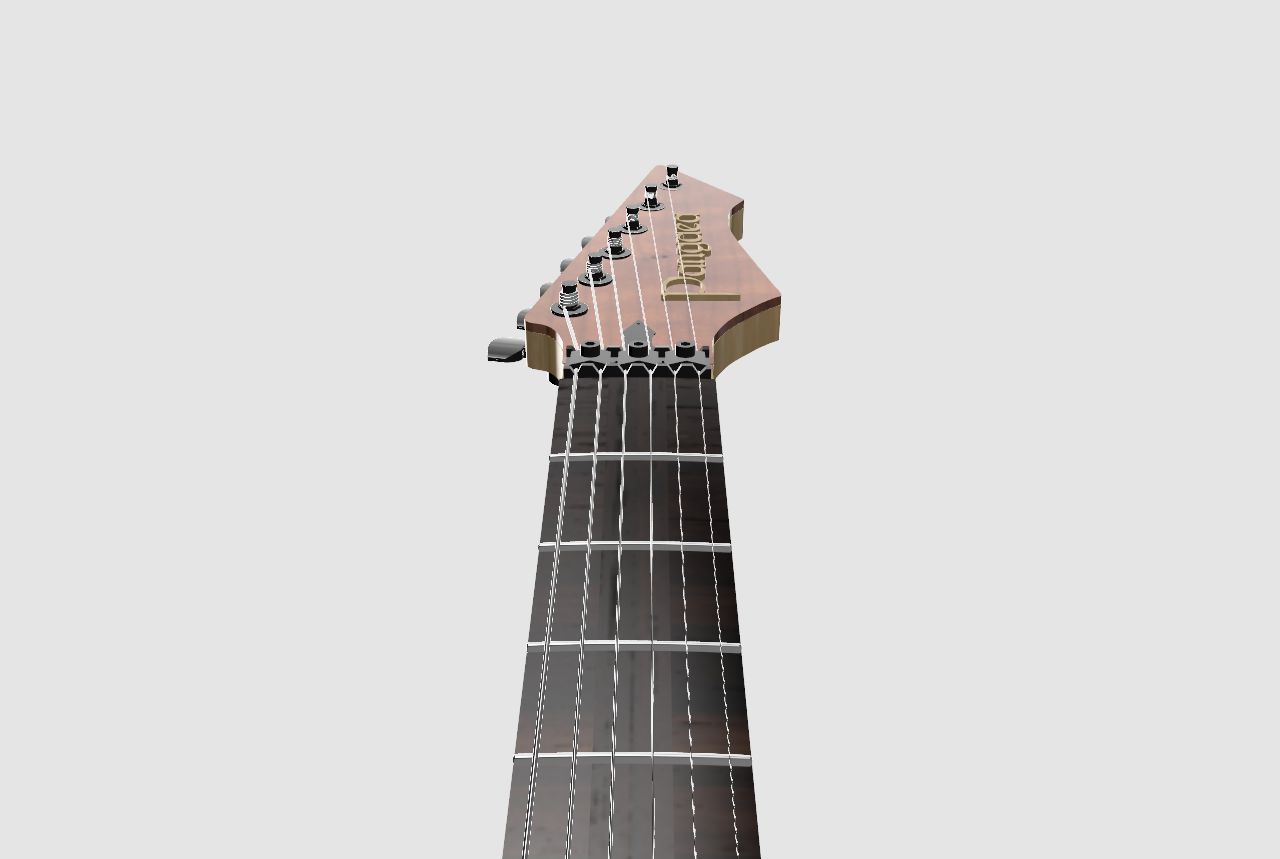
I finally finished my first project!! Well, pretty much. I have everything I need to machine my guitar finished. I have a few of the electronics done and will probably finish them just to satisfy myself but there's not really any need.
Thanks to all you guys that helped me get through! Especially Jesse, Phil, and TrippyLightniing!!!
Solved! Go to Solution.
Solved by TOwens777. Go to Solution.
26 REPLIES 26
Message 3 of 27
09-30-2015
05:02 PM
- Mark as New
- Bookmark
- Subscribe
- Mute
- Subscribe to RSS Feed
- Permalink
- Report
Message 4 of 27
09-30-2015
05:17 PM
- Mark as New
- Bookmark
- Subscribe
- Mute
- Subscribe to RSS Feed
- Permalink
- Report
09-30-2015
05:17 PM
Well done!
Omar Tan
Malaysia
Mac Pro (Late 2013) | 3.7 GHz Quad-Core Intel Xeon E5 | 12GB 1.8 GHz DDR3 ECC | Dual 2GB AMD FirePro D300
MacBook Pro 15" (Late 2016) | 2.6 GHz Quad-Core Intel Core i7 | 16GB 2.1 GHz LPDDR3 | 4GB AMD RadeonPro 460
macOS Sierra, Windows 10![]()
Message 7 of 27
09-30-2015
05:54 PM
- Mark as New
- Bookmark
- Subscribe
- Mute
- Subscribe to RSS Feed
- Permalink
- Report
09-30-2015
05:54 PM
awesome design. Are you really going to machine it and make it real? Be sure to post the "real" pictures if you do!
Jeff
Jeff Strater
Engineering Director
Message 8 of 27
09-30-2015
07:12 PM
- Mark as New
- Bookmark
- Subscribe
- Mute
- Subscribe to RSS Feed
- Permalink
- Report
09-30-2015
07:12 PM
Really nice job on your first project. My first project was a Fender Strat so I can relate to your experience in learning the program.
~Don
Message 9 of 27
09-30-2015
08:02 PM
- Mark as New
- Bookmark
- Subscribe
- Mute
- Subscribe to RSS Feed
- Permalink
- Report
09-30-2015
08:02 PM
Thanks guys!!! i am going to produce several of these guitars if I like the design. I purchased a CNC router a few months ago so I wouldn't have to keep hand carving. The finished guitar will probably look very different from the design. I will do the entire guitar with quilted maple and stain it with a sunburst finish as opposed to the mahogany brown (not to fond of that color) look in the model. There is no material to reproduce the stained maple look. I plan on cutting my first one out of cheap pine or poplar to make sure everything fits up propely. I will take pictures along the way.
Message 10 of 27
09-30-2015
08:20 PM
- Mark as New
- Bookmark
- Subscribe
- Mute
- Subscribe to RSS Feed
- Permalink
- Report
09-30-2015
08:20 PM
Can't wait to see it built! Should look great with quilted maple. I built one a few years ago with spalted maple... turned out well, but the density variation in the wood was such a pain to work with.

Message 11 of 27
09-30-2015
08:25 PM
- Mark as New
- Bookmark
- Subscribe
- Mute
- Subscribe to RSS Feed
- Permalink
- Report
09-30-2015
08:25 PM
Nice job Brian! I love maple of all flavors! It is a pain however. Did you hand carve it or CNC? Is that the model or the actual guitar? It's really hard to tell.
Message 13 of 27
09-30-2015
08:44 PM
- Mark as New
- Bookmark
- Subscribe
- Mute
- Subscribe to RSS Feed
- Permalink
- Report
09-30-2015
08:44 PM
since we are showing off... Here's the set that I've built. The upper right was the first, it was red mahogany. The two semi-hollow tele clones on the left were next, both maple, the lap steel was next (it was a nice break from having to put frets in!). Finally, I built the bass for my son. That one turned out the best, and I can't even play it!

Like Brian, I would have preferred to use an NC machine, even though I enjoyed the process.
Jeff
Jeff Strater
Engineering Director
Message 14 of 27
10-01-2015
07:12 AM
- Mark as New
- Bookmark
- Subscribe
- Mute
- Subscribe to RSS Feed
- Permalink
- Report
10-01-2015
07:12 AM
Jeff, very nice job! Those are some good looing instruments!! I love the blue hollow tele clone! I agree, I totally love hand carving but as you well know it's a slow process. Not to mention that you just have to try to visualize the finished product. That's why CNC was so attractive to me. Plus, I can cut on cheap wood to fit up the final product instead of blowing a $200 piece of quilted maple on a bad measurement.
I hear you on frets! Big pain in the butt!
Any chance we could get quilted maple as a material? It would be nice to have it in unfinished along with some stained colors.
Message 15 of 27
10-29-2015
09:38 PM
- Mark as New
- Bookmark
- Subscribe
- Mute
- Subscribe to RSS Feed
- Permalink
- Report
10-29-2015
09:38 PM
I was inspiried by this group to dive back into guitar modelng again. I have a friend with an NC machine that volunteered to let me use the machine to try a guitar body.
It's harder than I thought it would be, to be honest. Not the modeling part, but the planning part - having to get all the pockets and holes in exactly the right place. It requires getting very accurate measurements of components, and making sure that there is room for everything, etc. I'm using a Fender standard neck (not quite ready to mill the neck yet).
This is what I have so far. As you can see, it is based on a telecaster, but with a scultped top. It's not done yet. I may change the shape a bit, and the knob layout, etc. I still have quite a bit to do to make sure it's all laid out correctly, and I have to figure out how to get a channel in there to route the pickup wires from the neck pickup to to control cavity.
So, wish me luck...


Jeff
(we should start a Fusion guitar design group...)
Jeff Strater
Engineering Director
Message 16 of 27
10-30-2015
10:03 AM
- Mark as New
- Bookmark
- Subscribe
- Mute
- Subscribe to RSS Feed
- Permalink
- Report
10-30-2015
10:03 AM
Jeff, that looks great! It really is harder than it looks!!! I found that out very quickly. I did a test cut on my CNC last weekend and it was mostly good but I did locate a few problems. I decided to do my model over to fix some otherwise pain-in-the-butt issues. I'm progressing very rapidly this time as I am able to use many of the components from the previous model. My model is much cleaner and well designed this time around.
On the wiring cavity you basically have 2 options. One is to route it in the top or back and cover it with a pick guard or plastic plate. Or, you could make your body a 2 piece laminate (this is what I do.) Split your body leaving 3/8", 1/2" at the top (depending on your contour, you can then route your wiring cavities on the inside of the back piece and glue the top piece over it. Here's a good video on this method using a Les Paul design. https://www.youtube.com/watch?v=JgY4zP2LS5M
I look forward to seeing the final product!
I am all in for a guitar design group!
Message 18 of 27
10-30-2015
12:54 PM
- Mark as New
- Bookmark
- Subscribe
- Mute
- Subscribe to RSS Feed
- Permalink
- Report
10-30-2015
12:54 PM
@TOwens777 @jeff_strater I am glad you guys keep this thread alive. Great to see such progress!
Message 19 of 27
10-30-2015
02:31 PM
- Mark as New
- Bookmark
- Subscribe
- Mute
- Subscribe to RSS Feed
- Permalink
- Report
10-30-2015
02:31 PM
Thanks, @TOwens777. I think for this first attempt, I may go with the plastic cover, and keep it in one piece. Although the split body approach would make a much cleaner design.
I have a way to get access to the bridge pickup, with careful positioning of the electronics cavity:


(which reminds me, I need to add a sweep cut to get a platform for the cover to sit on). And that will work OK. But to get the wires between the neck PU and the bridge PU cavities... I'm gonna have to either put another small plastic cover on the back, or figure out how to drill a horizontal hole afterwards... I don't want a pickguard on the front. This will give me something to do this weekend.
Jeff
Jeff Strater
Engineering Director
Message 20 of 27
10-30-2015
02:32 PM
- Mark as New
- Bookmark
- Subscribe
- Mute
- Subscribe to RSS Feed
- Permalink
- Report
10-30-2015
02:32 PM
that looks great! Keep the updates coming.
Jeff
Jeff Strater
Engineering Director
Reply
Topic Options
- Subscribe to RSS Feed
- Mark Topic as New
- Mark Topic as Read
- Float this Topic for Current User
- Bookmark
- Subscribe
- Printer Friendly Page
Forums Links
Can't find what you're looking for? Ask the community or share your knowledge.
Post to forums
