You are correct there are many ways to get this done, so the following probably is not the most efficient. Its often best to just build out all your construction lines so that you can make drafting easy. That said... i didn't do that in this exercise. (but not doing it first let to making mistakes along the way)
Some helpful things are using different layers and using your OSNAPS. You need to know how to use those.

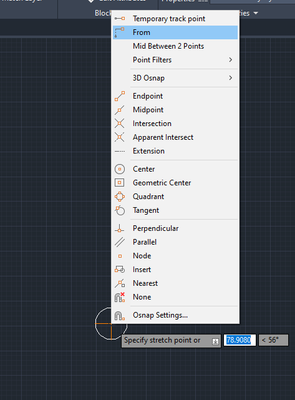
Below is where you can find OSNAPS and an image of the OSNAPS i use.


It looks like you can take advantage of bilateral symmetry in this one. I drew a center line on a layer that isn't my main drawing. Then, I started drawing lines at full length and then moved them by the midpoint to a line that I will later use to mirror the whole object. (If you use point filters and some of the other overrides it could make that process easier, but I'm trying to show you a way you can start to work without knowing a whole lot.

Once i have the line at full length drawn I grab it by the mid point and move it.

Next I drew another line in the same manner.

Next I drew the vertical run

Then I mirrored the inner boundary geometry using that vertical run mid point. This part can get confusing if you use the wrong dimensions. (This is why its better to build construction lines first)

Next Ill begin working on some of the fillets. Here i prefer to use CIRCLES and the TRIM command for ease of seeing whats going on. Here I'm going to use the tan tan radius version of the circle command.


Begin Trim


Now ill use mirror to copy that part to the bottom.


Next I drew a line to indicate the distance that will be covered by the fillets. (ill be using circles here instead of the fillet command.

I drew the circles and then used the quadrant OSNAP to move them by their quadrants to the locations seen in the image.

Next i began the line command. In the line command i hold CTRL + RIGHT CLICK to bring up the snap override menu. Here i will draw my line tangent to both circles.


Now its back to the trimming


Now I created some more construction lines to help through the next few steps.


I drew some more construction lines to help.

For the next circle i didn't see the necessary dimensions so I used an estimation. I assumed that it would likely be between the who size of the circles so i used 6.35 since its between 3.17 and 9.52... Read you directions to make sure they didn't cover that dimension else where.

Then again.. there were no dimensions for that exterior radius. say so i just assumed the exterior circle would be twice the radius of the smaller circle. and moved on. Again look over your notes and the rubric for this to make sure they do not indicate what to do there.

Next i drew another circle and moved it using quadrants.

Then, I utilized the tangent between the circles line again.


Then some more trimming

I started filling in the other geomtery


You can get different line types from the line menu

If you need to change the line type after that can be done in the properties pallette as well. (CTRL + 1 , or right click on the items and select properties).
The i continued to add gemotery.

A helpful override to use is the from override. This allows you to move an item as though it was from another location. This helped me make short work of moving items around to the proper dimensions.

Next I made another assumption (third one so far by my count). I assumed that the distance of the small circle is the same as the one from the bigger circle at the top. I didn't see that dimension called out.. though i could have overlooked it.

I started back with some of the boundary work


I used the line command with the tangent overrides again

Ill use it again on the lower circles.


Go around trimming everything up. Notice I trimed everything up to the center symmetry line.

I turned off the construction line layer

Now just mirror,


I'll save all the annotations as an exercise for you.
CADnoob


