Adaptive toolpath problem..

Adaptive toolpath problem..

Anonymous
Not applicable
565 Views
6 Replies
Message 1 of 7

Adaptive toolpath problem..

Anonymous
Not applicable

Hello,

I have an issue and I can't get my head over it....  I have the same operation, with litterally the same settings in both operations.  One is from version 77 .. the other is .. well now at version 999999. 


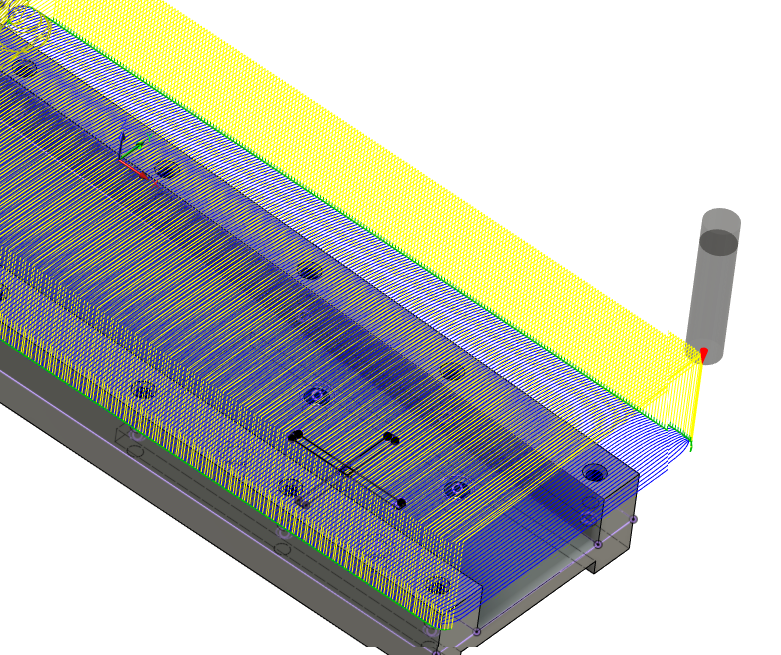
The one picture with the straight lines, is the toolpath I want. In the first product it milled fast and perfect.. But now somehow i reopened the file and the toolpath changed to the rounded toolpath and I can't get it back. Unless I go back to version 77. But as many many other parameters are changed.. I can't go back. I have tried everything.. From reopening, resetting the lines, copying the operation to the "newer file" selecting the same lines, changing stay down level, minimum radius, entry points.. Nothing helps. Basically the toolpath from the rounded one doesnt change at all.


What can I do? Because the material in the middle will be bad for my cutter and as there is many many features to be milled.. Must be something easy right? ... But even when I made an exact copy of the operation (copy / paste) it doesnt give me the right toolpaths back... 


0 Likes
566 Views
6 Replies
Replies (6)
Message 2 of 7

seth.madore
Community Manager
Community Manager

S1 is what you're after?

Can you share your file?


Seth Madore
Customer Advocacy Manager - Manufacturing


0 Likes
Message 3 of 7

Anonymous
Not applicable

Hmm I rather not as it contains customer sensitive information.  I was hoping for advice from a programmer that just knew out of the blink what it is that I need to change 🙂


But.. I understand it would make it easier to share the file. Not a decision I easily make. 


I'm after S2. Straight lines as it cuts the material more evenly.  S1 is the toolpath that now generates. And it gives me a very thin wall at the center.. With changes on toolbreakage etc.  The weird part is that no matter what change I make. I keep getting that toolpath. Except for a few changes if I decide that it needs to start somewhere else etcetera.


0 Likes
Message 4 of 7

Mattxer
Advocate
Advocate

S1 is exactly what I would expect to see from an adaptive toolpath, I'm not sure how you got S2 with that toolpath. To get the same type of toolpath as S2 I would use a 2D contour and just have a bunch of roughing stepovers. That thin sliver from S1 is annoying but that's just how Adaptive calculates it. It can be detrimental to your endmills.

Matt Smith
Software Engineer - MSmithDev - https://msmithdev.com/
CAD/CAM/CNC - Micro Insert Inc. - https://microinsertinc.com/
Message 5 of 7

Anonymous
Not applicable

I dont know how I got S2 either. It has exactly the same values. I even tried to copy that operation from an earlier save to the newer one .. but I don't get the same result. No matter what I try.


I was so happy with the result. But I guess will work arround it. As the S1 is no option for this as it will problably break the tool. 

0 Likes
Message 6 of 7

Mattxer
Advocate
Advocate

Yeah, not sure why it did that. Also depending what material you're cutting, the sliver in the middle usually wont do to much damage as long as its not really tall or thick. I mainly work with heat treated 4041 and 80% of the time i get by with no damage to the endmill. Otherwise I just run a 2D contor with X steps to clear that material and then use adaptive with rest machining to finish rouging out the part.

Matt Smith
Software Engineer - MSmithDev - https://msmithdev.com/
CAD/CAM/CNC - Micro Insert Inc. - https://microinsertinc.com/
0 Likes
Message 7 of 7

Anonymous
Not applicable

Yeah this is what I did in the end.

I also had another problem, milling this part with adaptive clearing.


There was a open pocket in in there.. and it seemed to cut perfectly. But I missed one weird toolpath that just slotted into the part... breaking the tool after 15 minutes of milling... I don't understand why it did that. THe parameters shouldnt allow it to go over 10% of the milling diameter into the part. But it did anyways.


I guess, I just have to check everything carefully from now on. 

0 Likes