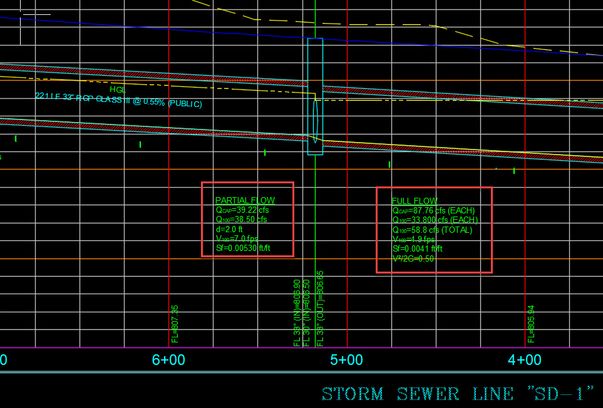
One of my favorite parts of civil engineering is performing hydraulics & hydrology (H&H), which involves a lot of math. In 2010 I wrote a blog post on my old blog "Tony's Civil3D World" which caught a lot of attention by engineers, designers, and even Autodesk. This blog post was about creating a hydraulic label for concrete storm pipes under full flow conditions. If you are not from Texas, most cities in Texas require you to show the hydraulic pipe data in the storm profiles. The data displayed the pipe capacity, pipe velocity, pipe friction slope, depth of flow, and flowrate or Q100. Back then in 2010 there were no tools or feature within Civil 3D that could perform this analysis other than using SSA or Hydroflow Express extension tools, and other 3rd party software. Most engineers, would perform this task with their own custom hydraulic spreadsheet or using software such as FlowMaster and CulvertMaster also.
So one night, I decided to tackle this issue and stayed up all night to try to figure out how to automate this process. Most engineers and designers right now are using mtext or a basic pipe label to add the hydraulic data. This manually typing in your hydraulic data for each pipe segment can be a tedious task, which most don't enjoy. For those engineers that perform hydraulics, knows that Civil 3D lacks the hydraulic engineering formulas to perform this task within the pipe labels properties. So I basically had to break down the Mannings Equation to its simplest math equations with expressions. Below are 9 simples steps on how to create you full flow hydraulic pipe label.
Step 1: Create Wetted Pipe Parameter Expression

Step 2: Create Pipe Area Expression

Step 3: Create Hydraulic Radius Expression

Step 4: Create K Expression

Step 5: Create Friction Slope Expression

Step 6: Create Full Flow Velocity Expression
So when you are in full flow conditions a simple formula is Q/A.

Step 7: Create Pipe Capacity Expression

Step 8: Create Pipe Flowrate

Then the final step, create a pipe label style, and in the Text Component Editor, Properties Tab, all the expression that you created are now available to be used. To make all the expression work, you just need to add the stormwater drainage flowrate within the pipe properties of each pipe.


Please note, since I released this post in 2010, other engineers have create a more condensed down version of what I created to perform the same task. If I remember right, a 2.0 version of this was later introduce in the Mastering Civil 3D book in 2012 or 2013 release. Second, this pipe label was created for pipes created from upstream to downstream. Hopefully this will give you great ideas on how to take advantage of expression in Civil 3D. Maybe you can create a partial flow pipe data label style, which is more challenging but it can be down. Finally but not least, if you don't know, you can do pipe hydraulics with the new Analyze Gravity Network tool within Civil 3D. Thank you for your time.