Windows not cutting walls

Windows not cutting walls

Anonymous
Not applicable
30,347 Views
21 Replies
Message 1 of 22

Windows not cutting walls

Anonymous
Not applicable

Hi All, 


This seems like a simple thing but for the life of me I can't find the issue. 


I am busy drawing up an existing house. I'm wanting to imput the windows onto the floor plans but when I insert them they do not cut the wall. I have set the walls us to aprear grey in the floor plans. I am using a view template for the existing plans and have different folders for Council and Working drawings with their own view templates. But for some reason I've fallen at the first hurdle. Everything is being drawin as 'existing' so it is all on the same phase at the moment. I've also played around with the view range to no avail. The doors are showing correctly it's just the windows that aren't working. It seems to be a problem with my view range and the fact that I put a view filter on the walls.  


Here's a screen shot.


Thanks,

Candice

0 Likes
Accepted solutions (1)
30,348 Views
21 Replies
Replies (21)
Message 2 of 22

davidtetro
Advocate
Advocate

If the window sill is set higher than the cut plan of your view range - or the window head is set lower than your view range, it will not cut the way you want it to. If this is the case, use the 'Plan Region' (View Tab, Plan Views pulldown Plan Region). This will allow you to create an instance in the location you choose to change the view settings.


Create a rectangle around the window that is not cutting appropriately with the Plan Region tool and then set the view settings of that particular plan vregion. I find this helpful in basements where the windows are close to the ceiling, sometimes around stairs where I want the cut line in a different place and even fireplaces where the opening to the fireplace is below the cut plane.


Let me know if this works for you.

Message 3 of 22

Anonymous
Not applicable

That's a really cool feature and I think it'll definitely come in handy in the future. But unfortunately this problem is not limited to a single window but all of them. There is something strange going on with my view range that I'm having trouble solving.


Thanks for the feedback though. I didn't know about the isolated view range tool. Very handy!

Message 4 of 22

davidtetro
Advocate
Advocate
Accepted solution

Interesting. Are the windows being placed in the model at the same phase as the walls were placed? Is it possible to post the model Revit file? I have had some screwy things happen and it had to do with some of the phase settings or graphic settings. Once I nailed down which issue it was, I was able to resolve it. Maybe you can do a graphic override of the all the instances in that particular view...it is odd...

Message 5 of 22

Anonymous
Not applicable

The windows and walls on on the same phase.


How do I post the model? it's 22,804 KB and autodesk says the file type is to large to post. 


I think you right with the phase/graphic settings. I've used a project template and I think some of those settings are funky, well, that's at least what I think. Beacause the 3D model also displayes not as I would lile. I'm considering scraping the model and starting again.... I've only been working on if for about a day. 


If you see anything strange here I would seriously appreciate it! 


0 Likes
Message 6 of 22

L.Maas
Mentor
Mentor

If you want post the project you could strip it of unnecessary elements. For example leave it to a single wall with window. Purge the remaining items.

Verify that the problem still exists and see if it is reduced far enought to upload the model.


Otherwise you can always upload it to another site (e.g. wetransfer) and post the link.

Louis

EESignature

Please mention Revit version, especially when uploading Revit files.

Message 7 of 22

Anonymous
Not applicable

I've played around with phases settings and graphic views and it seems to be bahaving itself now.


Thanks for all the input and for the suggestions. Really appreciate this platform! 


Have a great day. Hope that's the last of my revit problems for a while. 

0 Likes
Message 8 of 22

davidtetro
Advocate
Advocate

Glad it helped you. Revit does not usually exhibit bad behavior so sometimes it has to do with a setting or something that was overlooked. Believe me, I struggled in the beginning and this Community helped me out a lot. Revit is fun - keep at it. Post any other questions or issues you have.


Again, I am glad that I was able to help.

0 Likes
Message 9 of 22

Anonymous
Not applicable

Make sure that all of the existing objects are on the "Existing" phase.  New objects will not show.

0 Likes
Message 10 of 22

Anonymous
Not applicable

If this happens again try to bump the window with the arrow keys in one direction then the other. This happens when phasing windows and doors. When you demolish an existing element Revit fills the void with a wall. So when you add a new window or door to the existing opening of a demolished window or door you need to bump the window for the cut of the new window or door to take effect. Hope this helps. 


Message 11 of 22

Anonymous
Not applicable

@Anonymous 


Hello, 


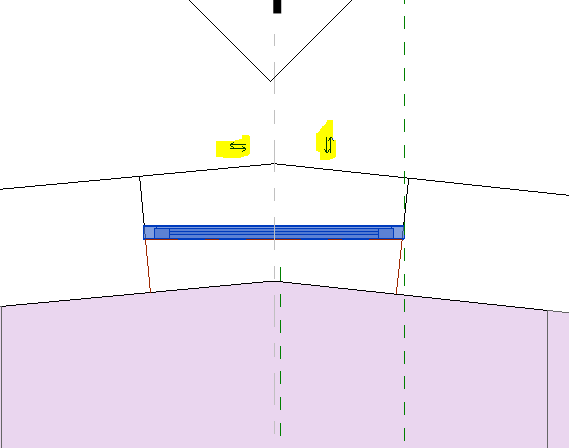
I came across your solution and I don't understand what it means to bump the arrow keys. It is this image I attached?

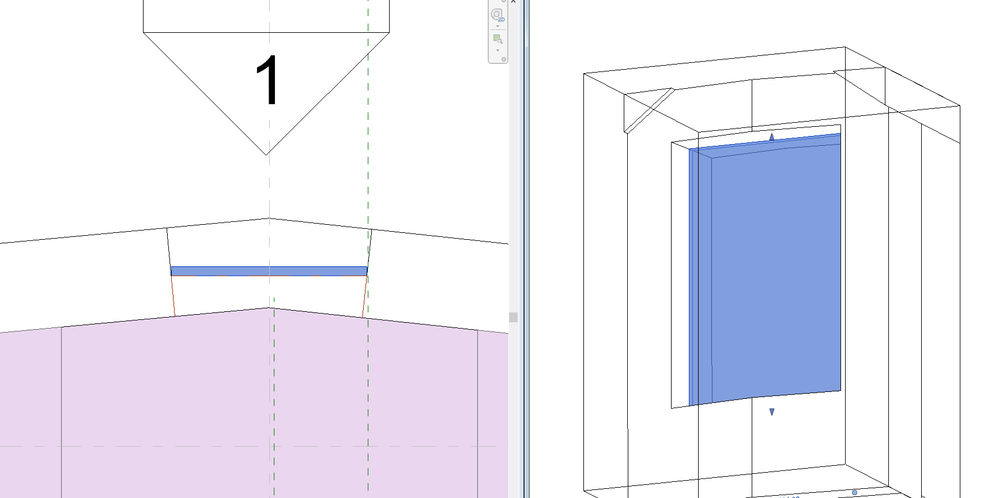
I have same problem when I try to make a window on a corner where 2 walls intersect. Basically I made a void in the 2 walls with the opening of the window. Then I made a new thin wall in between, inside the void and I placed my window inside this thin wall. The window and the thinarrow keys?arrow keys?window inside the thin wallwindow inside the thin wallthe thin wall I put inside the void that cuts the 2  wider wallsthe thin wall I put inside the void that cuts the 2 wider walls wall have the same dimensions and location. (ex: sill height 54cm). When I try to put the window and I give it sill height 54cm it does not work and the windows gets deleted. It works with sill height 53.90cm for example. 


I tried to changed those arrows and the window position back and forth but it still doesn't work. 


Thanks in advance. 

0 Likes
Message 12 of 22

Anonymous
Not applicable
If you left click on the window or door you are having trouble with then
tap the directional arrow key on the keyboard either left or right it will
cause the object to cut the wall. This happens because when you create a
window and set it to demo in phasing revit fill the void of that window
with wall space. so you have to shift the new window that you are putting
in to "cut" the new wall that it created. so "shift" it left the "shift" it
right. should fix the problem.
0 Likes
Message 13 of 22

Anonymous
Not applicable

it is likely deleting the window because you are trying to place it slightly outside of the "thin wall" you created. Try making the "thin wall" just a little taller or a little wider than the window actually is. It could be just a mm or two but it should be just slightly bigger than the window being placed. Try that. 

Message 14 of 22

Anonymous
Not applicable

Hello, 


Thanks very much! Making the wall slightly bigger worked. I had tried that before but I was hoping for another cleaner solution. But this is the only one that worked for me. 


Thanks again! 

0 Likes
Message 15 of 22

Anonymous
Not applicable

the other option would be to edit the size of the opening of the window. Select the window you are having trouble with edit the family go to the properties window select the front or back view and isolate the void form that cuts the wall. make this void form just one or two mm smaller and it should also work. This may change the way the window presents in schedules though so I would recommend double checking the schedules after doing this. 

0 Likes
Message 16 of 22

Anonymous
Not applicable

Thank you! Didn't think of that, I understand now. 

I might try it if for later is proven to be better for the situation I am in. For now the wall a bit bigger works. 


Thanks again! 

0 Likes
Message 17 of 22

ike
Community Visitor
Community Visitor

Thanks David,

i had a similar issue and this solved it for me! ....Ahhh - scratching my head for so long, and i missed this simple thing!

Thanks buddy!

0 Likes
Message 18 of 22

davidtetro
Advocate
Advocate

glad it helped. I find that I need to do a plan region from time to time for things like basement windows. This way I do not have to set the 'global' cut plane to 7 feet.

0 Likes
Message 19 of 22

mfdunahee
Explorer
Explorer

Probably unrelated to this situation, but just for anyone who this solution didn't work for- make sure there's only one wall instance *-.-

0 Likes
Message 20 of 22

ebilgedincer2002
Community Visitor
Community Visitor

Hello, my problem looks related to that thing you explained. Can you please explain how can I understand if there is only one wall instance or not? When I draw a single wall, windows can cut through it. But when I try it on the walls of the building, which were modeled while the chain option was on, it does not work. What can be the problem? Thanks in advance.

0 Likes