Animating Conveyor Belt?

Animating Conveyor Belt?

Anonymous
Not applicable
8,530 Views
22 Replies
Message 1 of 23

Animating Conveyor Belt?

Anonymous
Not applicable

Hi so I am new to this what I am trying to get is a Conveyor belt animating just like in the supermarkets/factories the thing is I am trying to roller it on its y-axis just like rotating without moving I tried a lot of things 

1.change pivot place didn't work it still moves to other sides

2.tried freezing translate pivots didn't work it didn't change anything

3.adding wire and make it rotate I followed this tutorial https://www.youtube.com/watch?v=Hu4-XTNbV0s I arrived to this point where to change "dropoff distance" but it seems it ain't there

A tip I didn't find output so I clicket input

(if u could find another solution to make this type of animation plz don't hesitate to tell me)

0 Likes
Accepted solutions (1)
8,531 Views
22 Replies
Replies (22)
Message 2 of 23

Anonymous
Not applicable

you have applied deformer on the spline. it should be on the deformed object instead. the guy in the video changes the value in the OUTPUT section. on your screenshot it is INPUT.

0 Likes
Message 3 of 23

Anonymous
Not applicable

Well  yeah I mentioned it earlier in the tip, I fixed it by just one clicking one enter and change the Dropoff distance but it didn't work but when I do actually try it with a torus it works is there is anything wrong with my object, I just I want it to rotate its own axis without moving it just like a conveyor belt in the supermarket

https://streamable.com/5dnp5m see it to know more about my error

0 Likes
Message 4 of 23

Anonymous
Not applicable

the point of the method is that you take a polygon with the same shape as a spline -> tube and circle. then you attach the model to the spline with the wire deformer. then you deform the spline so that the model gets the desired shape. what you have done is just taking elliptical shape and attaching it to the circle.

and make sure the pivots are located at the same point.

0 Likes
Message 5 of 23

Anonymous
Not applicable

Yes,  I totally agree with it does work while not putting them aligned together but in my model, it doesn't work I tried creating a spline by its shape it doesn't work, do have any idea how to make it spin like  Conveyor Belt in a supermarket without creating new shape cause I already modeled it u could u try it

0 Likes
Message 6 of 23

Anonymous
Not applicable

Hey mate I did the spline to the same size as the polygon still nothing 

Message 7 of 23

Anonymous
Not applicable

you should not adjust the spline to the geo. here is another tutorial: https://www.youtube.com/watch?v=zahnLLkq7Mc


0 Likes
Message 8 of 23

Anonymous
Not applicable

So I should remodel it,, there is no way to do it without remodeling it

0 Likes
Message 9 of 23

hamsterHamster
Advisor
Advisor
Accepted solution

The conveyor belt and its rig could be made within 5 mins.

1. Create pCube, make Width 10, subdivisions Width 50;

2. Create Nurb Circle, set Sections to 16, rotateX 90.0 ;

3. Select both cube and circle and go Deform>CurveWrap - the cube will wrap around the curve; enable LoopClosedCurves;

4. Move and reshape curve to fit the contour of the conveyor;

5. In polyCube node extend the Width so the both ends meet, decrease Height to some 0.1, make conveyor-wide Depth, add divisions, if necessary;

6. in the CurveWrap options animate the Offset param to get the belt sliding.

The only tricky part is the orientation of the curve, you won't be able to tilt it in one axis (here -X), therefore plan ahead the correct orientations.

hamsterHamster_0-1618884033885.png

Presto!


,,,_°(O__O)°_,,,
Maya2019.1 @ Windows10 & GeForce GTX1080Ti

If the post was helpful, click the
 ACCEPT SOLUTION  button, so others might find it much more easily.

Message 10 of 23

Anonymous
Not applicable

Hi it worked and gave me the filter I needed but I need to rescale it to fit the mode I don't know how to rescale edges around them, thank u I will accept your answer as a solution 

0 Likes
Message 11 of 23

hamsterHamster
Advisor
Advisor

How did you made this? I couldn't. Have you scaled anything? Just don't!

Set curve and cube scales back to something uniform, better to the default 1.0 for XYZ. Edit the pCube's PolyCube [creation] node instead - enter size of dimensions there. Also, edit the curve CVs, to fit around the conveyor's frame.


,,,_°(O__O)°_,,,
Maya2019.1 @ Windows10 & GeForce GTX1080Ti

If the post was helpful, click the
 ACCEPT SOLUTION  button, so others might find it much more easily.

0 Likes
Message 12 of 23

Anonymous
Not applicable

I tried resizing everything to one it even seems worse, Sorry I didn't even get everything u said in your reply could u do a video so I could get more better

0 Likes
Message 13 of 23

hamsterHamster
Advisor
Advisor

Quite contrary, it is BETTER than before, the geo is good, the curve still seems scaled, even if you have scaled CVs X axis, this is not fitting your conveyor, obviously. If you followed my notes, then there should be sufficient number of CVs to accommodate two wheels and still have some left to control the section in between.

hamsterHamster_0-1618923947617.png

If it is not enough, then you can Modeling>Curves>Rebuild[options], or redo everything (which is not THAT much) from scratch, just with even more Sections on the circle.

And, you obviously have accessed PolyCube node before, set the Height attribute to something small, the cube will resemble a tape (for its settings, see my initial screenshot right in the middle).


,,,_°(O__O)°_,,,
Maya2019.1 @ Windows10 & GeForce GTX1080Ti

If the post was helpful, click the
 ACCEPT SOLUTION  button, so others might find it much more easily.

0 Likes
Message 14 of 23

Anonymous
Not applicable

As you said I am new to this yesterday I did have the curve warp plugin here is a video for what I did I did everything u said and then resized it to show it is the same thing I don't know how just to model it to my object

0 Likes
Message 15 of 23

hamsterHamster
Advisor
Advisor

You were doing this fine, except, what I said about scaling - you don't! - neither polyCube nor nurbCircle. And you did not increase the number of the circle segments, the default 8 can be to little to wrap around the wheels.

Did you try to press F8 key with curve selected? Alternatively click those buttons:

hamsterHamster_0-1618942652497.png

There you will enter curve editing mode - reshape the curve in the Front view. See approximate CV arrangement in my previous screenshot.


,,,_°(O__O)°_,,,
Maya2019.1 @ Windows10 & GeForce GTX1080Ti

If the post was helpful, click the
 ACCEPT SOLUTION  button, so others might find it much more easily.

0 Likes
Message 16 of 23

Anonymous
Not applicable

Hey, I did what u said I changed them by their endpoints and I got it to the position I needed, but I think didn't take the full outline. ,,, how about I keep the outline curve and redo the curve warp with a new cube + can I change the size  of the cube beforehand, Thank u for staying this long I think I arrived at that point that I needed I think I will do some tests not to bother u 

0 Likes
Message 17 of 23

hamsterHamster
Advisor
Advisor

The curve you have made is little of use, because your tape won't be that thick, and the ends are not round. Just ignore the size of cube for now - if it confuses you, hide it, hide everything, except those two rolls at the end of conveyor frame, - and reshape that wretched curve, for which you don't need that insane number of CVs, the less is more. I've even made you an example with 16 CVs, why can't you just copy those approximate positions to your CVs? Snapping to grid helps a lot.

Yes, you are right, testing before asking is the way I'd prefer myself, this is how I learn.. what are you going to lose? a curve? a cube? There's a little fun in commenting every mouse move, sorry.


,,,_°(O__O)°_,,,
Maya2019.1 @ Windows10 & GeForce GTX1080Ti

If the post was helpful, click the
 ACCEPT SOLUTION  button, so others might find it much more easily.

Message 18 of 23

Anonymous
Not applicable

Thank u this is by best far the answer, I wanted yes the curves and curve warp are new to me so testing will help more that is the effect that I need now I just need to remake it with bigger cube or less subdivisions in the width I will be testing till I get the results I needed I will reply when I do it, after all thanks for this new solution to help doing my animation it helped me a lot in my knowledge of maya again thanks.

Message 19 of 23

Anonymous
Not applicable

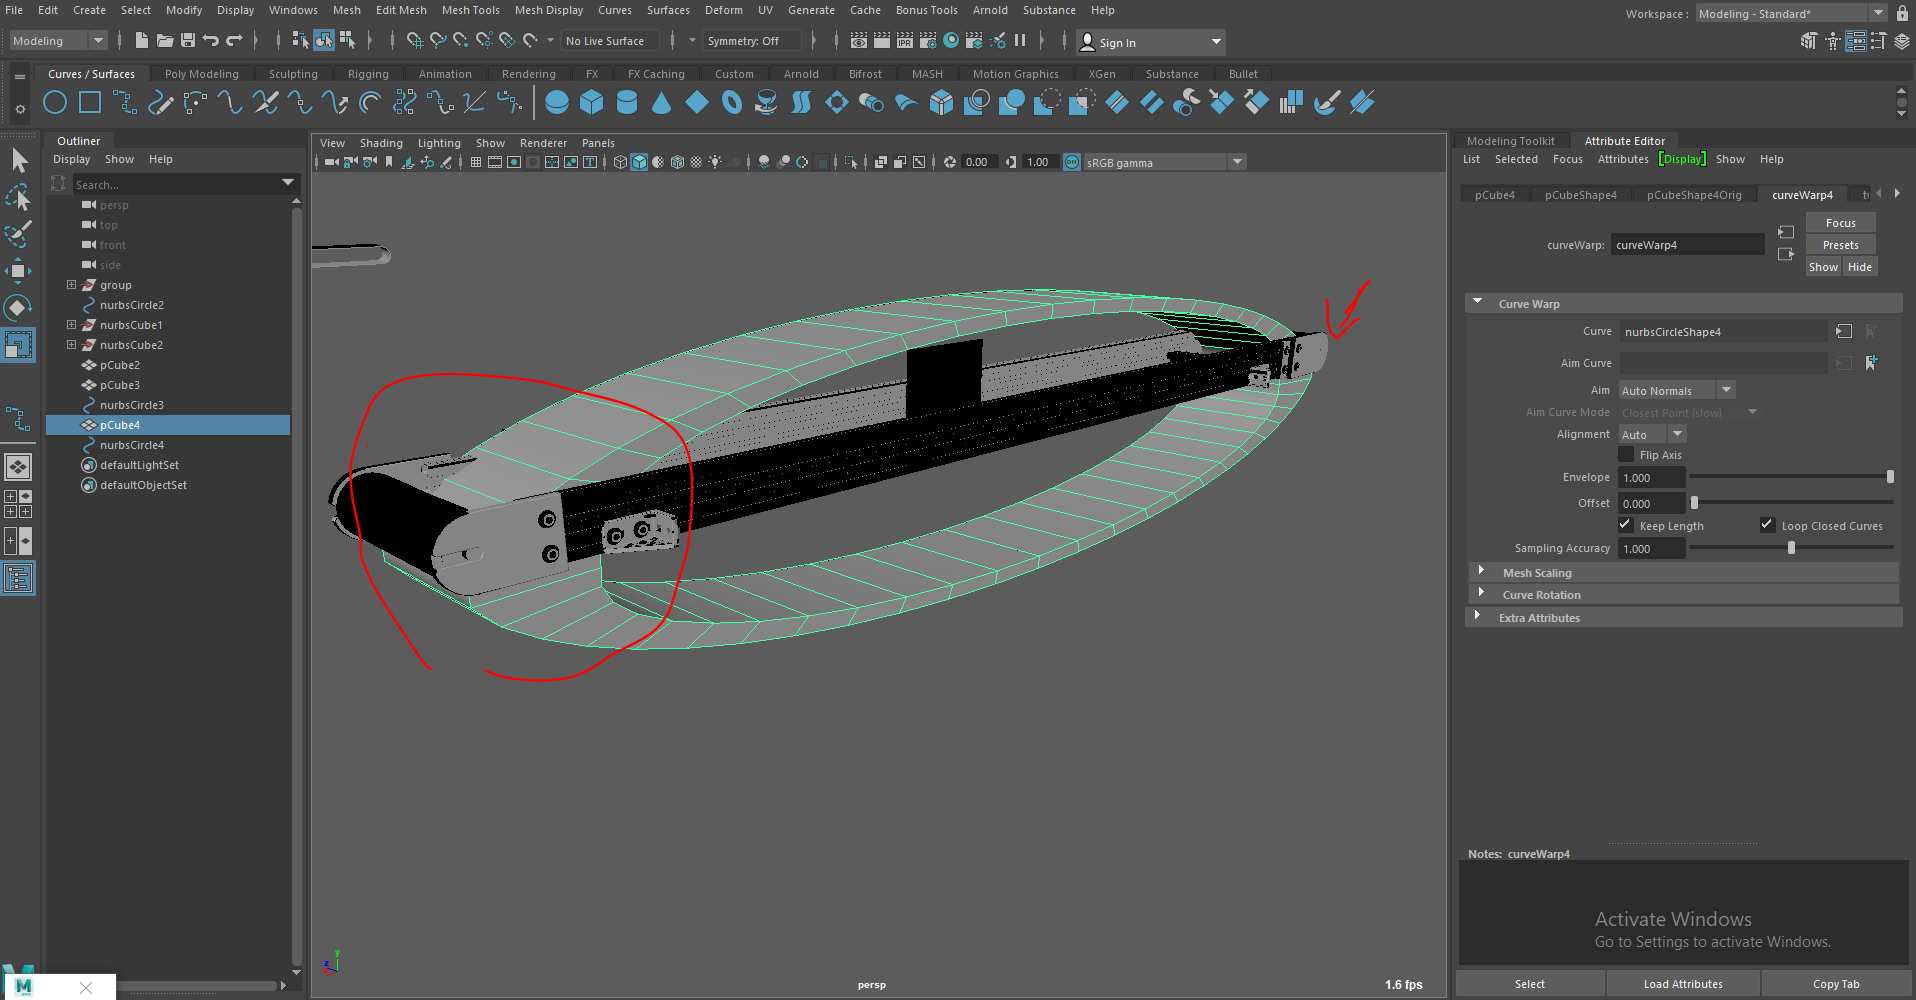
I made it like what I wanted and tried changing offsets and keyframing them still it didn't get keyframed, the offest is working but not the keyframes taking any change  any idea how to animate it in a scene

Message 20 of 23

hamsterHamster
Advisor
Advisor

Works totally fine for me here. The curveWarp.offset is limited to 1.0, yet you can enter any larger number. Also don't forget to enable curveWarp.loopClosedCurves.


,,,_°(O__O)°_,,,
Maya2019.1 @ Windows10 & GeForce GTX1080Ti

If the post was helpful, click the
 ACCEPT SOLUTION  button, so others might find it much more easily.

0 Likes