Community
- Forums Home
- >
- Fusion Community
- >
- Manufacture Forum
- >
- How to rotate part in vise?
Fusion Manufacture
Talk shop with the Fusion (formerly Fusion 360) Manufacture Community. Share tool strategies, tips, get advice and solve problems together with the best minds in the industry.
Turn on suggestions
Auto-suggest helps you quickly narrow down your search results by suggesting possible matches as you type.
Reply
Topic Options
- Subscribe to RSS Feed
- Mark Topic as New
- Mark Topic as Read
- Float this Topic for Current User
- Bookmark
- Subscribe
- Printer Friendly Page
Message 1 of 12
02-13-2021
07:02 AM
- Mark as New
- Bookmark
- Subscribe
- Mute
- Subscribe to RSS Feed
- Permalink
- Report
02-13-2021
07:02 AM
Hi All
Fresh to manufacturing so and I would like to ask how to transfer partially machined part into the next fixture?
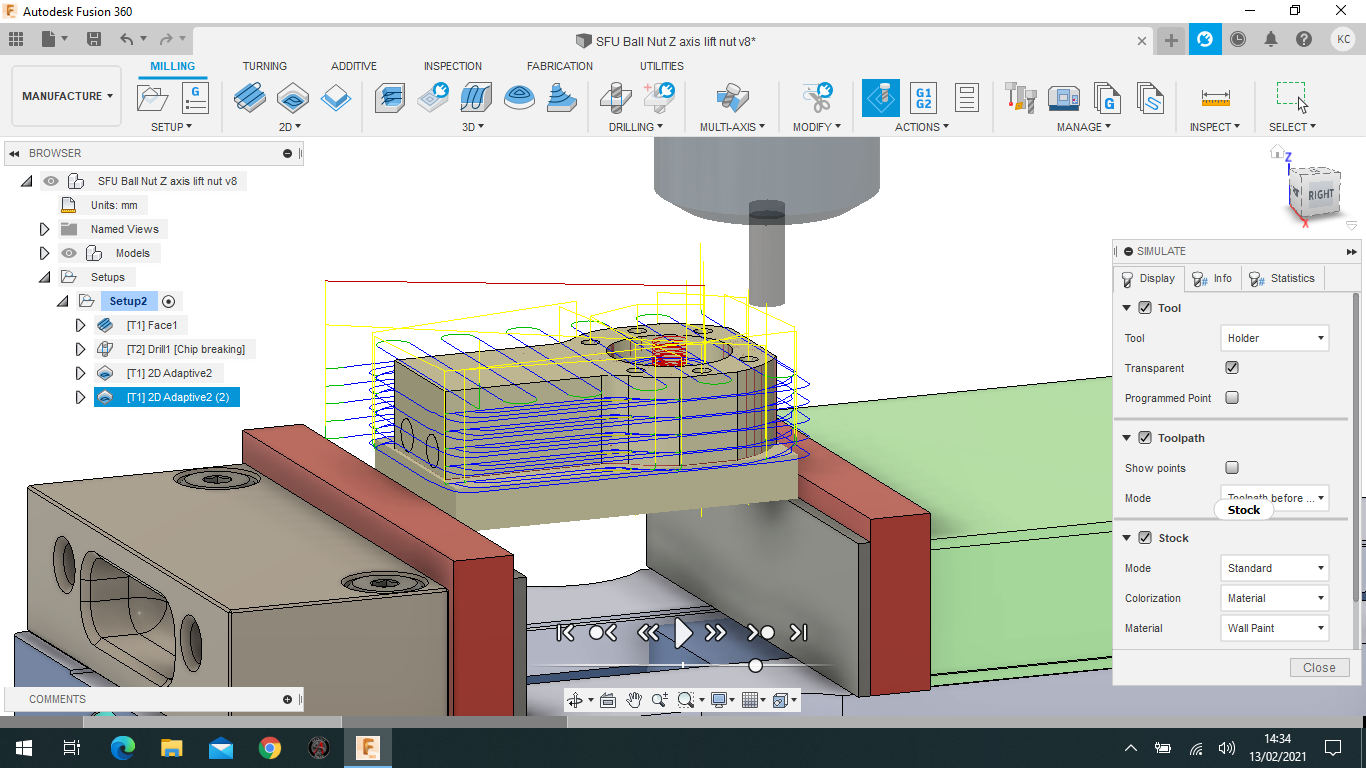
This part is machined 2/3rd with 10mm stock left at the bottom. I now want to transfer that "block" or rotate 180deg so that I can reference them and machine the part in the next vise.
Any help is greatly appreciated.
The screenshot and model attached for reference.
Thanks
Solved! Go to Solution.
Solved by seth.madore. Go to Solution.
Solved by seth.madore. Go to Solution.
11 REPLIES 11
Message 2 of 12
02-13-2021
08:05 AM
- Mark as New
- Bookmark
- Subscribe
- Mute
- Subscribe to RSS Feed
- Permalink
- Report
02-13-2021
08:05 AM
If you want to have a vise that represents both stages of the part, you're going to need to have two vice models loaded, one in each orientation. Create another setup for the second op and set your WCS accordingly.
Personally, I just keep it at the soft/hard jaw stage to reduce the clutter on-screen.
Seth Madore
Customer Advocacy Manager - Manufacturing
Message 3 of 12
02-13-2021
09:45 AM
- Mark as New
- Bookmark
- Subscribe
- Mute
- Subscribe to RSS Feed
- Permalink
- Report
02-13-2021
09:45 AM
Thanks for your reply but that's not what I'm asking for.
Having second fixture is a must, so I get that. But what I'm actually asking for, is how to retain the partially machined model as shown on the screenshot and flip it so that it can reflect what's left to machine. As soon as you stop the simulation, the part returns to reflect the entire unmachined stock.
Message 4 of 12
02-13-2021
10:24 AM
- Mark as New
- Bookmark
- Subscribe
- Mute
- Subscribe to RSS Feed
- Permalink
- Report
02-13-2021
10:24 AM
To be fair, you didn't ask "how do I show the stock in the second op" so I went with the more basic understanding of "how do I machine the second side" which is a very common (and understandably so) question.
So, to use the stock from the prior op, there's this little gem in the preferences:

And set your Setup like this:

Result:

Seth Madore
Customer Advocacy Manager - Manufacturing
Message 5 of 12
02-13-2021
11:25 AM
- Mark as New
- Bookmark
- Subscribe
- Mute
- Subscribe to RSS Feed
- Permalink
- Report
02-13-2021
11:25 AM
Apologies Seth. My bad in wording, however I'm very grateful for your help buddy. 😀
Message 6 of 12
02-14-2021
02:07 AM
- Mark as New
- Bookmark
- Subscribe
- Mute
- Subscribe to RSS Feed
- Permalink
- Report
02-14-2021
02:07 AM
Hiya again
How do I now flip that partially machined body and transfer it to the next vise?
Thanks
Message 7 of 12
02-14-2021
03:02 AM
- Mark as New
- Bookmark
- Subscribe
- Mute
- Subscribe to RSS Feed
- Permalink
- Report
02-14-2021
03:02 AM
The part doesn't move it's physical position. Your Design setup is going to look like this:

And you're going to toggle visibility as needed for each vise.
Seth Madore
Customer Advocacy Manager - Manufacturing
Message 8 of 12
02-14-2021
03:13 AM
- Mark as New
- Bookmark
- Subscribe
- Mute
- Subscribe to RSS Feed
- Permalink
- Report
02-14-2021
03:13 AM
Hmm, that seems like a hell of a problem when I`m going to have to apply constraints. Isn`t there any way to export what's already machined? I`ve seen a guy don't it but it only exports to mesh.
Message 9 of 12
02-14-2021
03:41 AM
- Mark as New
- Bookmark
- Subscribe
- Mute
- Subscribe to RSS Feed
- Permalink
- Report
02-14-2021
03:41 AM
Whether you have vises side by side or one over the other, joints need to be added to do things properly. So no, moving a part isn't really something that's done. It can be achieved however through joints and motion links (I think). But really, unless you're doing super complex stuff, a set of jaws in each position and selecting those in my Setup is really all I do for the large bulk of what I run in my own shop, which are no simple parts, to be sure.
The Sync Visibility button in Manufacture makes light work of this chore

Seth Madore
Customer Advocacy Manager - Manufacturing
Message 10 of 12
02-14-2021
03:47 AM
- Mark as New
- Bookmark
- Subscribe
- Mute
- Subscribe to RSS Feed
- Permalink
- Report
Message 11 of 12
02-14-2021
04:05 AM
- Mark as New
- Bookmark
- Subscribe
- Mute
- Subscribe to RSS Feed
- Permalink
- Report
02-14-2021
04:05 AM
Just another option is to just add the amount of rectangle block to your original model and then use that as "Solid Model" , you know how much there is because you will have just machined the first side so can actually physically measure it accurately, a bit "ugly" but works well if done right. I would always use "soft jaws machined out for the shape as in images.


Message 12 of 12
02-14-2021
08:57 AM
- Mark as New
- Bookmark
- Subscribe
- Mute
- Subscribe to RSS Feed
- Permalink
- Report
Reply
Topic Options
- Subscribe to RSS Feed
- Mark Topic as New
- Mark Topic as Read
- Float this Topic for Current User
- Bookmark
- Subscribe
- Printer Friendly Page
Forums Links
Can't find what you're looking for? Ask the community or share your knowledge.
Post to forums
