Community
Fusion Design, Validate & Document
Stuck on a workflow? Have a tricky question about a Fusion (formerly Fusion 360) feature? Share your project, tips and tricks, ask questions, and get advice from the community.
cancel
Showing results for 
Show  only  | Search instead for 
Did you mean: 

Model A Decorative, High Poly Chandelier In 3D Studio Max Part - 6

0 REPLIES 0
Reply
Message 1 of 1
SerdarHakann
476 Views, 0 Replies

Model A Decorative, High Poly Chandelier In 3D Studio Max Part - 6

SerdarHakann
Advisor
Advisor

Model A Decorative, High Poly Chandelier In 3D Studio Max Part – 6


Step 50


Apply an Inset on the top polygon, and then add two new loops on each edge as shown below.


50.jpg


Step 51


Add loops where the connections are between the spheres and cylinders.


51.jpg


Step 52


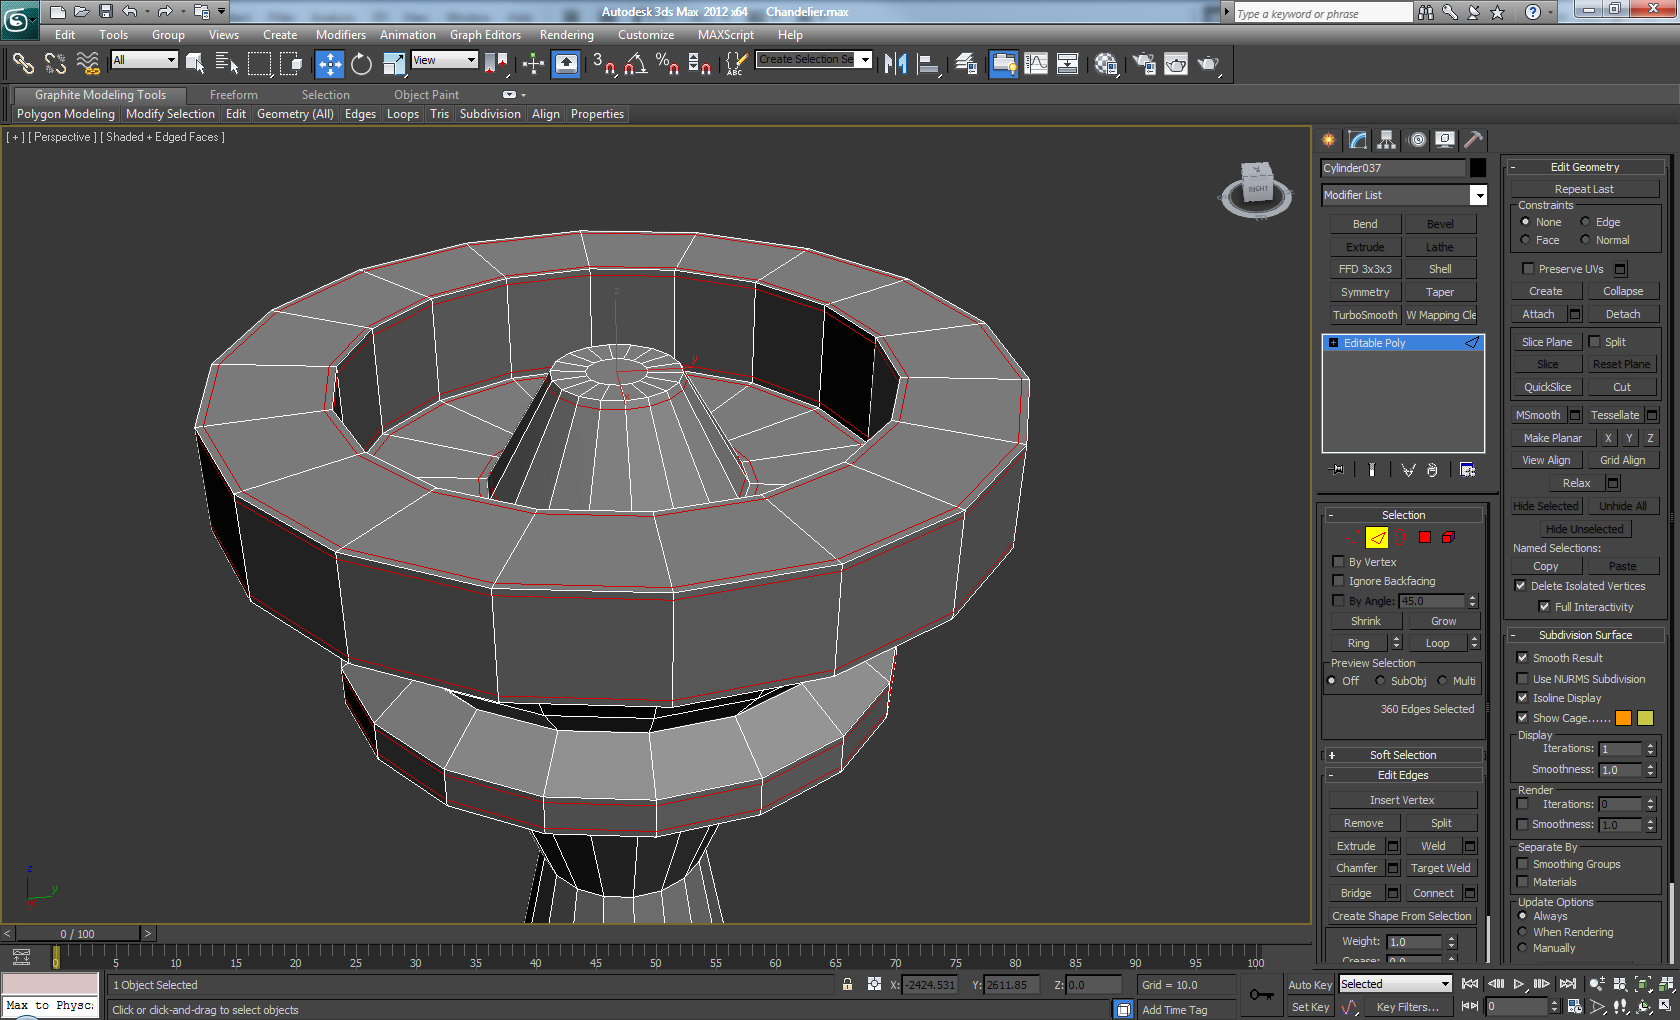
On the top Create two new loops around the inside of the center and then using the Loop Tools make a hole on each side. Create a Torus object (Create > Geometry > Torus) with 8 sides and combine it to the object using Attach. Finally Delete the bottom 6 polygons of the torus and connect the elements together using Bridge, set the segments to 2.


52.jpg


Step 53


On the center polygon apply an Inset and then Extrude with a negative Height value, and then Delete the center polygon. On the edge apply a Chamfer and set the segments to 2. Finally apply a Turbosmooth modifier - Iterations 2.


53.jpg


Step 54


Create a new Cylinder with 2 Height Segments and Convert it to Editable Poly. Then on the bottom polygon, apply an Inset two times, then Extrude and finally Inset again.


54.jpg


Step 55


Apply a Bevel two more times, and then an Inset two times as shown below.


55.jpg


Step 56


On the top, we apply an Inset and then Delete the polygon.


56.jpg


Step 57


Create a new Cylinder, Convert it to Editable Poly and Scale down the bottom polygon, then Bevel it four times.


57.jpg


Step 58


Apply a Bevel four more times in order to get a rounded shape like this.


58.jpg


Step 59


Now Bevel again five more times in order to get this shape.


59.jpg


Step 60


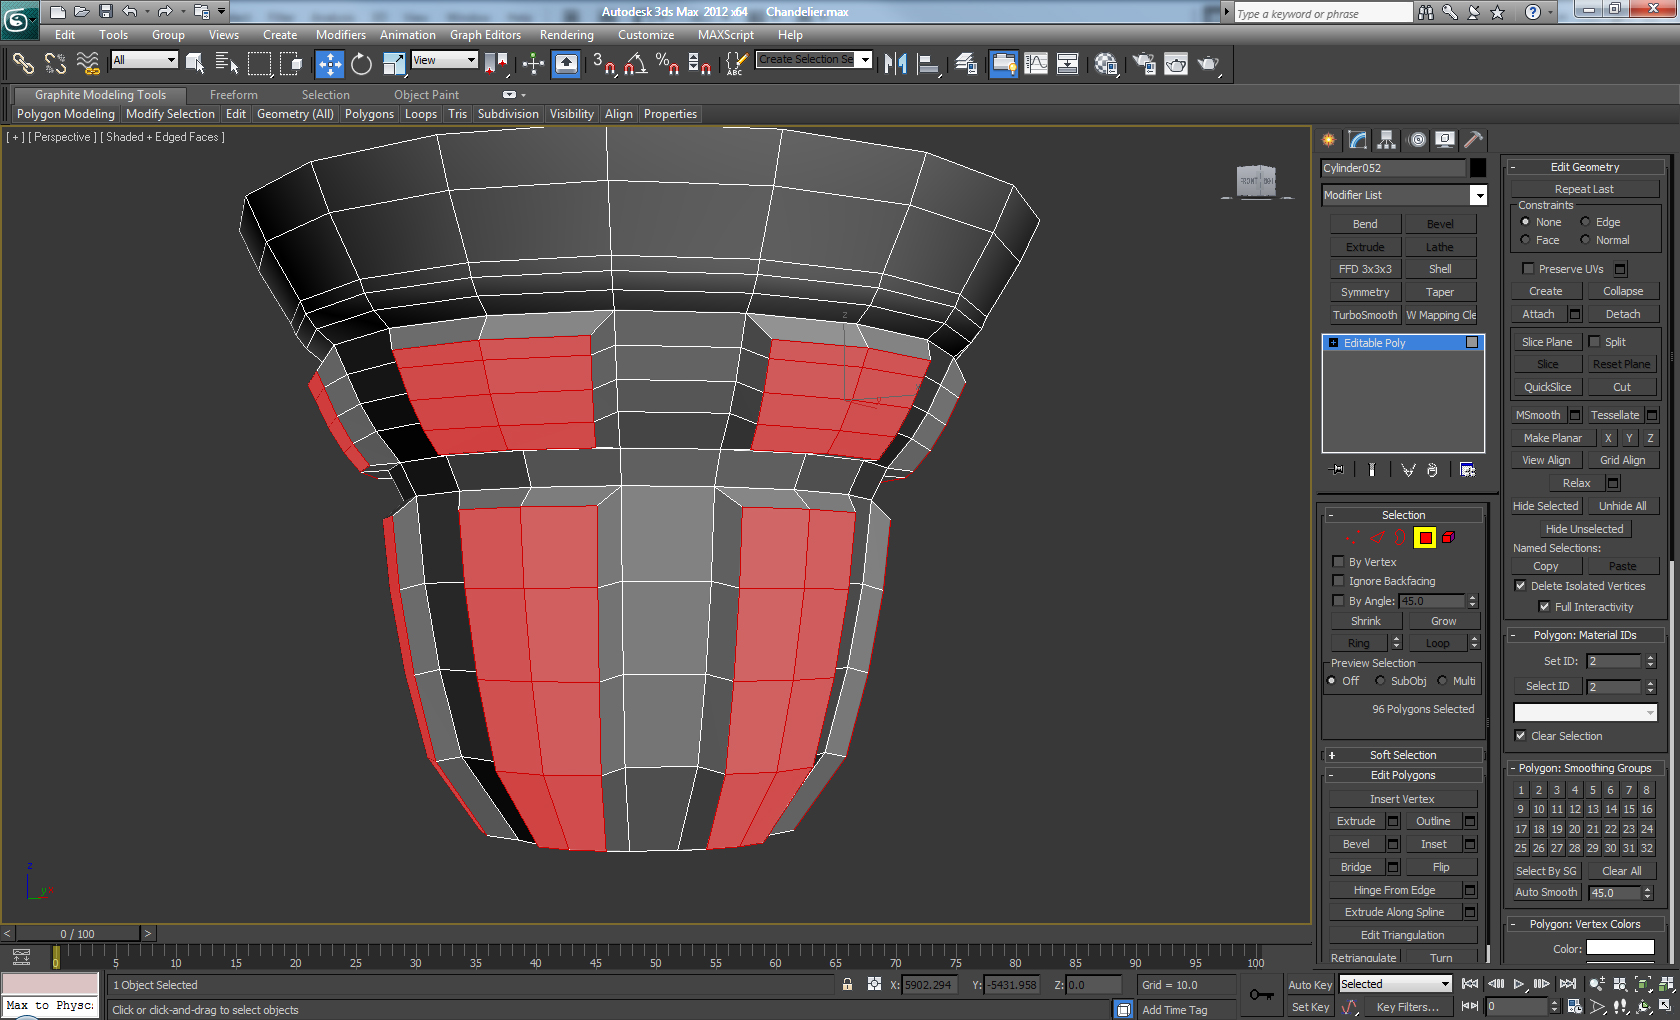
Select the groups of polygons highlighted below, and apply a Bevel.


60.jpg


Forumlarımızda çözülen sorularınızı "ÇÖZÜM OLARAK KABUL ET" seçimiyle işaretlemeyi lütfen unutmayın.

Beğendiğiniz mesajları lütfen "Övgü Puanı" ile ödüllendirin.

3D Generalist |Serdar Hakan.NET | Serdar Hakan AKADEMİ |


serdarhakanakademi
0 Likes

Model A Decorative, High Poly Chandelier In 3D Studio Max Part - 6

Model A Decorative, High Poly Chandelier In 3D Studio Max Part – 6


Step 50


Apply an Inset on the top polygon, and then add two new loops on each edge as shown below.


50.jpg


Step 51


Add loops where the connections are between the spheres and cylinders.


51.jpg


Step 52


On the top Create two new loops around the inside of the center and then using the Loop Tools make a hole on each side. Create a Torus object (Create > Geometry > Torus) with 8 sides and combine it to the object using Attach. Finally Delete the bottom 6 polygons of the torus and connect the elements together using Bridge, set the segments to 2.


52.jpg


Step 53


On the center polygon apply an Inset and then Extrude with a negative Height value, and then Delete the center polygon. On the edge apply a Chamfer and set the segments to 2. Finally apply a Turbosmooth modifier - Iterations 2.


53.jpg


Step 54


Create a new Cylinder with 2 Height Segments and Convert it to Editable Poly. Then on the bottom polygon, apply an Inset two times, then Extrude and finally Inset again.


54.jpg


Step 55


Apply a Bevel two more times, and then an Inset two times as shown below.


55.jpg


Step 56


On the top, we apply an Inset and then Delete the polygon.


56.jpg


Step 57


Create a new Cylinder, Convert it to Editable Poly and Scale down the bottom polygon, then Bevel it four times.


57.jpg


Step 58


Apply a Bevel four more times in order to get a rounded shape like this.


58.jpg


Step 59


Now Bevel again five more times in order to get this shape.


59.jpg


Step 60


Select the groups of polygons highlighted below, and apply a Bevel.


60.jpg


Forumlarımızda çözülen sorularınızı "ÇÖZÜM OLARAK KABUL ET" seçimiyle işaretlemeyi lütfen unutmayın.

Beğendiğiniz mesajları lütfen "Övgü Puanı" ile ödüllendirin.

3D Generalist |Serdar Hakan.NET | Serdar Hakan AKADEMİ |


serdarhakanakademi
Tags (3)
0 REPLIES 0

Can't find what you're looking for? Ask the community or share your knowledge.

Post to forums  

Autodesk Design & Make Report