How would you model a seashell in Fusion 360?

LMF5000
Contributor
Contributor

How would you model a seashell in Fusion 360?

LMF5000
Contributor
Contributor

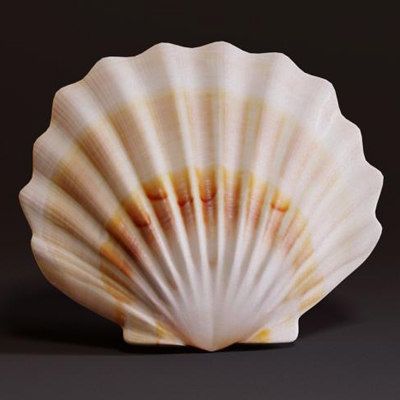
seashell.jpga259bcf6-3c5e-4448-ba44-405bb941bbe9Larger.jpg

By seashell I mean a shape like the above. It has me stumped because the underlying shape has smooth curves in all three axes, and the grooves all extend from the center (but in fusion we can only sketch on flat planes).


I tried using the sculpt workspace but didn't make much headway. I had some success sketching the perimeter and using a loft but I feel I'm approaching it wrong. I would be very grateful if someone were to show me the best practice on how to do it.

0 Likes
Reply
Accepted solutions (3)
14,168 Views
32 Replies
Replies (32)

chrisplyler
Mentor
Mentor


Are you wanting all the natural variance? Or are you asking about a mathematically uniform, sloping, wavy, radial array?

0 Likes

LMF5000
Contributor
Contributor

Both would suffice, the original aim was to 3D-print a seashell-shaped vase but I am also keen to expand my skillset.


What I've been trying to do was the former - that is, importing the attached image as a canvas and using it to guide my sketches. But I suppose a wavy radial array on a 3D-curved surface will also "look like" a seashell shape to a layperson so it would still work.

0 Likes

chrisplyler
Mentor
Mentor
Accepted solution


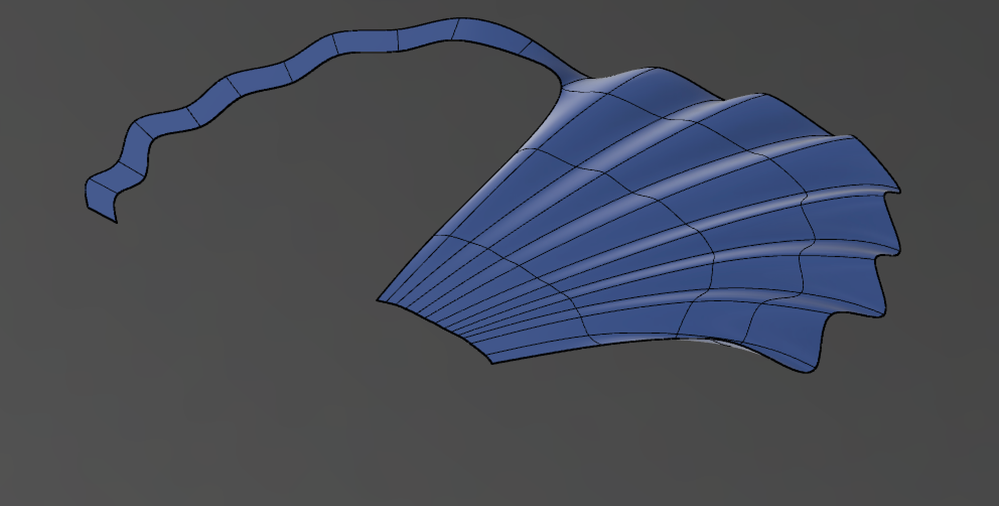
Here I have:


1. Sketched a Spline. (pretty straight)

2. Used a Circular Pattern to array that spline in a seashell-like way.

3. Moved every other Spline up higher.

4. Moved many individual control points around slightly to introduce variety.

5. Added a wavy Spline at each end to connect all the radials.

6. Lofted (in the Patch workspace) between the two wavy ends, using all the radials as Rails.


seashell.jpg

1 Like

chrisplyler
Mentor
Mentor


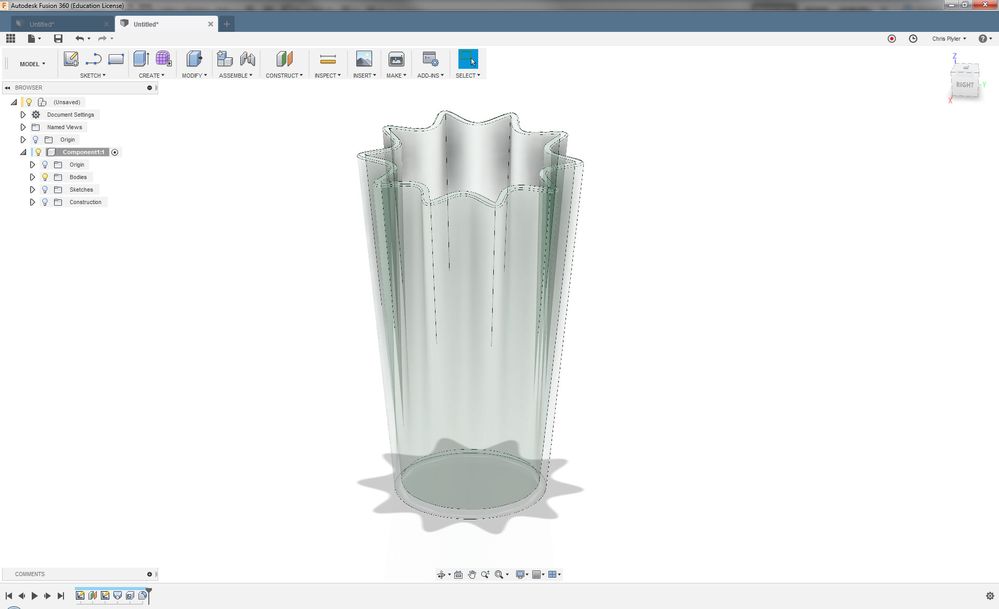
If you're talking about something like this, then I just sketched a circle at the bottom, a wavy spline at the top, lofted between them and finally shelled it.


seashellvace.jpg

0 Likes

LMF5000
Contributor
Contributor

That looks very promising! I'm going to try experimenting with 3d splines like you made, and the loft command in the patch workspace. Thanks for the tip!


I don't suppose there's a way to make it in fewer moves, to avoid selecting and moving alternate splines?

0 Likes

LMF5000
Contributor
Contributor

I see what you were thinking, but no, what I had in mind was to use a pair of mirrored seashell surfaces to make this sort of vase:


Image result for seashell vase

0 Likes

TrippyLighting
Consultant
Consultant

I'd do this as a T-SPLine/Sculpt/Form. Here's a start:


Screen Shot 2018-06-25 at 2.06.16 PM.png


EESignature

0 Likes

LMF5000
Contributor
Contributor

That's exactly what I was trying to do in sculpt mode. But I tried starting from a plane and it was getting quite involved to align all the lines to features on the shell. How did you get to that stage?

0 Likes

TrippyLighting
Consultant
Consultant

Basically you'll have to have an edge for each valley and peak. You could actually sketch the base mesh on a piece of paper and then model it flat in the sculpt workspace. I guess that's the key. Model a flat view first and then pull the valley edges and vertices down.


I'd have to make a screencast to explain that.


EESignature

0 Likes

LMF5000
Contributor
Contributor

First attempt with the spline-loft method in patch workspace. Not a bad start!

Untitled2.png

0 Likes

LMF5000
Contributor
Contributor

@TrippyLighting wrote:

Basically you'll have to have an edge for each valley and peak. You could actually sketch the base mesh on a piece of paper and then model it flat in the sculpt workspace. I guess that's the key. Model a flat view first and then pull the valley edges and vertices down.


I'd have to make a screencast to explain that.


That's what I struggled with - how do I create edges that align with the valleys and peaks? Any way to insert them manually or somehow align them with a 2D sketch spline?

0 Likes

TrippyLighting
Consultant
Consultant
Accepted solution

Here is a screencast has how I got started. It;'s not the fastest method, but that's OK. 


Sea Shell v2.png


EESignature

3 Likes

chrisplyler
Mentor
Mentor


Doesn't light up.


Also, you can take your impressive Sculpt environment skills and stick them where the sun don't shine you dang showoff. Smiley Wink

0 Likes

TrippyLighting
Consultant
Consultant

Mommy, mommy, @chrisplyleris being mean too me whaaaaa....


101892132.jpg


EESignature

0 Likes

PhilProcarioJr
Mentor
Mentor

@TrippyLighting

Shouldn't there be a tree in that image somewhere? Smiley Tongue


Phil Procario Jr.
Owner, Laser & CNC Creations

0 Likes

chrisplyler
Mentor
Mentor

@TrippyLighting wrote:

Mommy, mommy, @chrisplyleris being mean too me whaaaaa....


@TrippyLighting  knows I'm just throwing some sarcastic, friendly ribbing at him. I hope.

0 Likes

PhilProcarioJr
Mentor
Mentor

@chrisplyler

Yeah he does, as was I. One thing I can say about Peter is he can take a joke.


Phil Procario Jr.
Owner, Laser & CNC Creations

0 Likes

TrippyLighting
Consultant
Consultant

If i'd combine both of your suggestions, then that would combine into a glowing tree resembling something radioactive 😉


EESignature

1 Like

LMF5000
Contributor
Contributor

Wow, thank you for taking the time to make a 15-minute screencast. Using the alt+click to add geometry was a brilliant idea, I was actually trying to add it as a face each time (so it was taking me 4x as many clicks). I also learnt what the "weld vertices" tool does, so thanks for that too :).


I should have some free time this evening, I'm going to download the f3d you attached and try and figure out how you closed off the shell and gave it a flat square base.


Thanks for the help, you guys rock!

0 Likes