3D Sketch to Flat Pattern.

3D Sketch to Flat Pattern.

TinWhisperer
Advocate Advocate
4,360 Views
33 Replies
Message 1 of 34

3D Sketch to Flat Pattern.

TinWhisperer
Advocate
Advocate

3d sketch to flat.png3d sketh to flat 2.png3d sketch to flat 3.pngsquare to round body.png

I am looking for advise or work flow to go from a 3d sketch to a flat pattern .


I am going to use 26 ga galvanized material so it about .021 in thickness.


I have read through a few post on this site and checked out the couple available you tube videos but i find it does do not give me  the flat pattern  sometimes , most of the time.


I am trying to come up with flow so I can build any crazy transition in 3d sketch and make it flat.


I have and still use sketch up 8 pro with the "flattery" add on which work decently and will convert just faces to a flat pattern. 


but, I trying to covert all my work flow to stay within the fusion 360 ecosystem.


is there a way do convert surfaces / face to a flat pattern in fusion without thickening the face to a body? as if I was using a material like paper?


thank you

0 Likes
4,361 Views
33 Replies
Replies (33)
Message 2 of 34

TheCADWhisperer
Consultant
Consultant

@TinWhisperer wrote:


I have read through a few post on this site and checked out the couple available you tube videos but i find it does do not give me  the flat pattern  sometimes , most of the time.


What posts?  What YouTube videos?  Cite your sources of information.


There are no bends in your part?

Do you really want the Top to be 12 sides, or do you really want it to be circular?


Sketch1 is not fully defined - if you drag it, it moves form Origin?


TheCADWhisperer_0-1631895013459.pngTheCADWhisperer_1-1631895034609.png


BTW - Paper has thickness.  I often have my students create these transitions using paper.  We set the Thickness = .004 in or .1mm

Message 3 of 34

TinWhisperer
Advocate
Advocate

@TheCADWhisperer  Thanks for the reply.


What posts?


I searched "square to round " at the top here and read a few of the top results.


can you recommend any ?


What video?


one was your "Sheet Metal HVAC transition Piece in Fusion 360"

but it seems like it starts from the point where your flat pattern already exists and you are modifying it and seeing the results.


The other was "360 live: Creating HVAC parts in Fusion 360 Sheet Metal"

it this video he show using small radius corners on the rectangle on the bottom I was hoping not to do this. 


Can you recommend any others? 


There are no bends in your part?


Hopefully when I fabricate this part there will be 16 bends. I create this in the 3d sketch environment not sheet metal environment. I was hoping to converting it to sheet metal then flatting it.


Do you really want the Top to be 12 sides, or do you really want it to be circular?


I am use to laying these out with a pair of dividers, trammel points, ruler and triangulation. so that is why I am using 12 sides. I continue to use 12 or 24 sides in sketchup8 still, old habit I guess. 


Sketch1 is not fully defined - if you drag it, it moves form Origin?


I guess it is not? this must be some type of a issue? Still learning that is why I am here.

If it is a issue why?


BTW - Paper has thickness.  I often have my students create these transitions using paper.  We set the Thickness = .004 in or .1mm

Yes no doubt it does.  But a face doesn't. can I convert to a flat pattern from just a face, not a body?


Here is a couple screenshot of the process in sketch up 8 trying to do something similar with fusion 360 


rec to rnd sketch up 6.JPG

rec to rnd sketch up 1 - Copy.JPG

rec to rnd sketch up 5.JPG

rec to rnd sketch up 4 - Copy.JPG

In sketch up 8 

1. 3D Sketch fitting as needed

2.Index Edges

3. Unfold faces to flatten to same plane.


Looking to do some similar workflow in fusion 360. 

0 Likes
Message 4 of 34

TheCADWhisperer
Consultant
Consultant

So I take it that you want 12 straight lines rather than arcs.

Give me a few minutes to create that solution.

0 Likes
Message 5 of 34

TinWhisperer
Advocate
Advocate

12, 24, 36 sides


would be great. then it will be like standard layout with real tools. 


Standard old school sheet metal pattern development.


0 Likes
Message 6 of 34

TheCADWhisperer
Consultant
Consultant

@TinWhisperer wrote:

12, 24, 36 sides

standard old school sheet metal pattern development.


Not correct.

Arcs, not lines...

TheCADWhisperer_0-1631904985376.png

Giesecke et al Technical Drafting

0 Likes
Message 7 of 34

TheCADWhisperer
Consultant
Consultant

See Attached.

Paper Thickness.

Faceted sides as requested.

TheCADWhisperer_1-1631908772039.png


TheCADWhisperer_1-1631908325908.png


0 Likes
Message 8 of 34

TinWhisperer
Advocate
Advocate

I see how that picture is confusing you.

TheCADWhisperer_0-1631904985376.png


Here the sheet metal worker decided to use radial line development from the plan view (top)  some points are also projected from his elevation view  ( bottom) to populate his true length diagram (left).


then he uses the true length (left) diagram and triangulation to step out the flat pattern (right)


I also believe the method you provided is only from "regular" Form triangulation which if  applied to my current irregular form would start to break down and you would be left with a failed pattern.


Using radial line to populate the true length diagram only works for when all four four quadrates and the same or mirrored from the plan view.


here are a few pictures of a more common route for that layout.


IMG_20210917_122450.jpg

IMG_20210917_122500.jpg

IMG_20210917_122506.jpg


I have another 20 layout books some over a 100 years in age that spell out how to triangulate a square to round to the same fashion. 


My example is from 

"the new sheet worker pattern book" 1926 Chapter VI Section 3 Irregular Forms (Triangulation)  Problem 179 PGS 331-333 


I can provide more examples of standard old school pattern development  ?

0 Likes
Message 9 of 34

TinWhisperer
Advocate
Advocate

Thanks again for the file.


Definitely closer what I am after.


Can I turn on the history with that F3d file and scroll back through your steps?


steps.png

are those notches you added to prevent failing when converting to sheet metal?

steps 2.png

we cant end at the corner? we have to round this?


steps 3.png

0 Likes
Message 10 of 34

TheCADWhisperer
Consultant
Consultant

@TinWhisperer wrote:

Can I turn on the history with that F3d file and scroll back through your steps?


History is turned on.

0 Likes
Message 11 of 34

TinWhisperer
Advocate
Advocate

Thanks again

I turned off unhide on everything and now can see everything that happened.

Still getting use to Fusion 360.

0 Likes
Message 12 of 34

TinWhisperer
Advocate
Advocate

f360 square to round.png

is it required to radius the corners on the rectangle?


f360 square to round 2.png

This this geometry for the split in the pattern? 

f360 square to round 4.png

We applied fillet to the whole body? why?

f360 square to round 3.png

Why is sketch 7 made projecting this face? is it the flat surface for the flat pattern?


Still learning. Seems like I still have some foundational skills and methodology to learn.  

0 Likes
Message 13 of 34

TheCADWhisperer
Consultant
Consultant

@TinWhisperer wrote:

We applied fillet to the whole body? why?

Why is sketch 7 made projecting this face? is it the flat surface for the flat pattern?


One of the 4 rules of sheet metal - must have bends to be bent.  We often ignored this old-school 2D drafting in the previous century.  Now we represent the real world in this century 3D.


I probably could have omitted Sketch7 and simply Convert to Sheetmetal the Thicken.  That tool has not been in Fusion very long and for some reason I don’t trust it to work on complex geometry.  I might have had an unsatisfactory experience, I will check that technique on this part tomorrow.

0 Likes
Message 14 of 34

TinWhisperer
Advocate
Advocate

One of the 4 rules of sheet metal - must have bends to be bent.


Are you implying that the fillets become the bend lines?


sketch 8 dxf to f 360.png

I am able to export a super clean DXF from sketchup8 and insert it into Fusion 360.


but I going to keep at this fusion360 workflow hopefully I can get up to speed and stay in the fusion 360 ecosystem.


0 Likes
Message 15 of 34

TrippyLighting
Consultant
Consultant

@TinWhisperer wrote:

...


Still learning. Seems like I still have some foundational skills and methodology to learn.  


All of the models you've presented screenshots of so far work with infinitely thin surfaces. That allows you to make infinitely sharp creases/bends.

Real-world materials are not infinitely thin and resist bending.

As such, you are limited by the material properties, so your infinitely sharp creases MUST be radii. 

Fusion 360 attempts to somewhat simulate real material behavior (defined by the sheet metal rules for the chosen material) and does not allow infinitely thin creases.


EESignature

0 Likes
Message 16 of 34

TheCADWhisperer
Consultant
Consultant

arcs.png

Your book image shows arcs - not a polygon of lines.

I can't read the image to see how they developed the lengths, but I have several books myself and at least one of them is completely wrong.  The way we did stuff in 2D in the last century was a bit of simplification that was then resolved out on the shop floor.


@TinWhisperer wrote:

One of the 4 rules of sheet metal - must have bends to be bent.

1. Are you implying that the fillets become the bend lines?


2. I am able to export a super clean DXF from sketchup8 and insert it into Fusion 360.


@TinWhisperer 

1. Don't take my word for anything.  

Go out to the shop floor.

Select a piece of the thickest material that you can bend with your equipment.

bend it 90° with the tightest inside radius (zero radius if you can get it with your equipment).

Attach real world photo of the bend here.


2. You are able to create simplified rubbish representation in software that does not represent the real world.

0 Likes
Message 17 of 34

TheCADWhisperer
Consultant
Consultant

@TinWhisperer wrote:

f360 square to round.png

is it required to radius the corners on the rectangle?


No, but if sharp corners are used - must include relief as it would otherwise be other than *cylindrical or conic deformation.   (One of the 4 rules of sheet metal in CAD.) 

0 Likes
Message 18 of 34

TinWhisperer
Advocate
Advocate

arcs.png

yes that is a arc for sure...

The sheet metal worker uses a compass, dividers or trammel point to create the circle in the plan view.

after the circle is created they would step off or divide the circle into 12 points.

and later in the drawing during the actually pattern delovopment they would use their dividers to step off the 12(13) points of the patterns to "round" end.


Even through a compass, dividers or trammel points draw arcs to triangulate points. the points are used to construct the pattern.


The arcs are only used to find points. 


Between two points is a line.
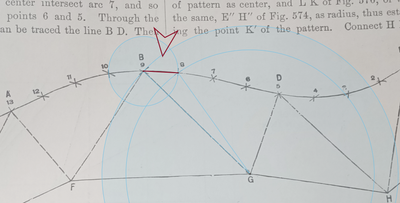
 

lines 2.png


the pattern is made of lines between triangulated points.


Then a curve ruler, fridge magnet is used to approximant the curve through the points at the round end of the pattern.


@canadiansheetmetal 

1. Don't take my word for anything.  

Go out to the shop floor.

Select a piece of the thickest material that you can bend with your equipment.

bend it 90° with the tightest inside radius (zero radius if you can get it with your equipment).

Attach real world photo of the bend here.


I do not deny that bend radii exist or that metal deforms when bent.


2. You are able to create simplified rubbish representation in software that does not represent the real world.


Thanks... again why I am here try to find some workflow in fusion 360 to figure this out.


here is the difference between the fusion method and the surface unfolded method (sketchup8) 

overlaid.png

the radii on the rectangle is the 99% of the difference, 1% in this case is the bend allow and material thickness added.


Screenshot_20210918-052640.png

 Laid this out it 2017( 3x5 S&D to 4"round small flat back ) with a pair of dividers and a ruler and standard irregular triangulation.  


I assume 99+% of all square to rounds in the world, in service today are laid out with this method.

As "real world" as it gets. 


I am here trying to learn a better way moving forward.


So the best method in fusion 360 currently is your method provided above and/or 

https://www.youtube.com/watch?v=oGwn6SsyPwA&t=13s

or this youtube video? 

Quote from the video 44:34 @tallisb " Honestly I wish we has some functionality in our sheet metal that did these folds for you and maybe that will be down road on the roadmap for sheet metal. What I was showing here is a process, like if you had to do something like this, there is a way, not the fastest way, but this is a method for doing this"


Any other approaches available?


0 Likes
Message 19 of 34

TheCADWhisperer
Consultant
Consultant

Are you in agreement with me that the images in Message 1 & 3 are incorrect simplifications?

(You can certainly model/make an octagon solution, bot this is not a rectangle to round solution. 

0 Likes
Message 20 of 34

TheCADWhisperer
Consultant
Consultant

Then a curve ruler, fridge magnet is used to approximate the curve through the points at the round end of the pattern.


I do not deny that bend radii exist 

As "real world" as it gets.

Any other approaches available?


I know what you are after, (the bend lines) but first I need to establish that the simplified example you presented does not accurately represent the real world.  I have had this debate many times over the past 20+ years.

0 Likes