There are multiple ways to select a link in Revit. Sometimes you can see it and click to select. Other times you might use the selection filter. But there is another option that is fast and produces consistent results!
First, if you can see any easy to select part of a link, then this is quick and easy. Do it.
But, if you cannot see it -- maybe it is turned off in the view or hidden behind other elements -- you might be familiar with the selection filter method. If you select a large area of elements, you can use the selection filter to narrow down the selection to just Revit links. The drawback here is you might end up with multiple links selected. Notice, in the first image below, in the lower right, both the Structural and MEP links would be selected.
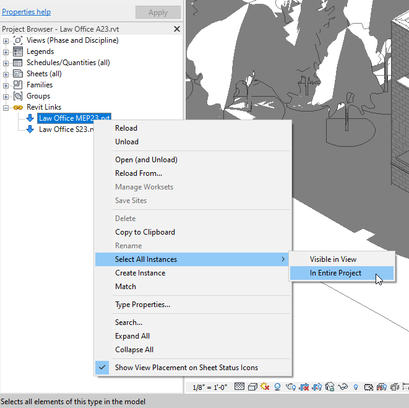
Now let's look at "the easy way"... simply expand the Revit Links section of the Project Browser, right-click on a link, and use one of the Select All Instances options! This is shown in the lower left corner of the first image below.
Tip: If you end up with more than one link selected here, that is a red flag! This likely means someone accidently copied the link or inserted it more than once... likely in the same location.

One more tip... once the link is selected, use the Temporary Hide/Isolate tool, shown in the image below, to quickly and safely change the view. Safely, meaning this is not a permanent change to the view and will not mess up construction documents for you or someone else on the project team!