Adding a different thickness to part of a slab

Adding a different thickness to part of a slab

Anonymous
Not applicable
4,344 Views
12 Replies
Message 1 of 13

Adding a different thickness to part of a slab

Anonymous
Not applicable

Consider the slab on the image, 250mm thick. 


I need to make the gray area on the right thicker, 500mm. Is there a way to "divide" the slab into two?


I tried the "divide" tool but it doesn't work on slabs in Robot 2012. I then created the slab in gray to the right, on top of the original red one. But then there's another problem: is it possible to trim the red slab somehow? The "trim" tool also seems not to do the job.


question autodesk.JPG


I'm trying not to have to remodel the slab from scratch and re-apply all the loads.


Thanks in advance

Joao

0 Likes
Accepted solutions (1)
4,345 Views
12 Replies
Replies (12)
Message 2 of 13

Anonymous
Not applicable

For the slab highlighted in red there are 3 options.


  1. Redraw it
  2. After slecting it (and it goes red) hover the mouse on one of the edges you want to move, the edge will go blue.  Then click this edge and you will be able to drag it to the new location (at the edge of the grey panel).
  3. Click on contour definition in the object inspector and manually edit the coordinates of the edge to be changed. 

Tony


0 Likes
Message 3 of 13

Artur.Kosakowski
Autodesk Support
Autodesk Support

If you create a smaller panel inside a larger one the properties assigned to the smaller one will be assigned to surface elements generated there. There is no need to trim the red panel (the overlapped part of the larger panel will not be 'double' meshed).


For the loads: you have to add smaller panel number (list of elements column in the loads table) to already defined surface loads or define them in the way shown below:


auto panel detection.PNG


If you find your post answered press the Accept as Solution button please. This will help other users to find solutions much faster. Thank you.


Artur Kosakowski
Message 4 of 13

Anonymous
Not applicable

Artur,


You won't get the "overlapping panels" error with this method?


Tony

0 Likes
Message 5 of 13

Artur.Kosakowski
Autodesk Support
Autodesk Support

No, you will not. This is a panel within a panel rather than a part of the panel over a part of a panel Smiley Happy

This 'cuts off' a part of a larger panel - in the same way you create openings (then it is just an inner contour with no new thickness assigned).


Artur Kosakowski
Message 6 of 13

Anonymous
Not applicable

The problem with this slab particularly is that it's made of lines and curves. By selecting an edge or node, it will drag the adjacent elements - if they're a curve, it will grow really big.


Probably the best way is to redraw it node by node with lines, two separate slabs. The problem with having one slab on top of the other is that the columns below would be connected to both slabs. That means that the node rigidity would not be calculated right, unless both the slabs would have the same equivalent moment of inertia as one 500mm slab, which is very unlikely!


Just wanted to know if there was a way to divide the slab into two, like you can do with the bars. But it seems there isnt.


Thanks for the reply though.

Joao

0 Likes
Message 7 of 13

Artur.Kosakowski
Autodesk Support
Autodesk Support
Accepted solution

1. Draw a line at the border of the thinner and the thicker parts

2. Mesh the panel as it is

3. Open the panel definition dialog and define the thicker/thinner part based on the selection of surface elements from either side of the line


panel on selection of surface elements.PNG


If you find your post answered press the Accept as Solution button please. This will help other users to find solutions much faster. Thank you.


Artur Kosakowski
0 Likes
Message 8 of 13

Mirko.Jurcevic
Collaborator
Collaborator

O   M   G !!

The whole morning I've been trying to do a simple task like that and I can't do it.  Smiley Frustrated

I want to change some part of slab to be 45cm thick (rest of the slab is 20cm thick), but there is no way to do it.


Why is panel manipulation so complicated?!


I am going to try that FE thing, but I am not optimistic..

If this solved your issue, please Accept it as Solution help other forum users with similar issues to find answers easily.
  
Mirko Jurcevic


My blog: www.engipedia.com
Try my Revit add-ins: Autodesk App Store
0 Likes
Message 9 of 13

Rafal.Gaweda
Autodesk Support
Autodesk Support
This way http://screencast.com/t/sTCYALMgO maybe?


Rafal Gaweda
0 Likes
Message 10 of 13

Mirko.Jurcevic
Collaborator
Collaborator

I'm sorry, but that's just not working for me.  Smiley Sad

I will send you link to my model and try to do that there.

If this solved your issue, please Accept it as Solution help other forum users with similar issues to find answers easily.
  
Mirko Jurcevic


My blog: www.engipedia.com
Try my Revit add-ins: Autodesk App Store
0 Likes
Message 11 of 13

Rafal.Gaweda
Autodesk Support
Autodesk Support
ok


Rafal Gaweda
0 Likes
Message 12 of 13

Mirko.Jurcevic
Collaborator
Collaborator

I must admit that I didn't read carefully posts made by Artur.

The solution / explanation that Rafal gave me is, in fact, already explainded by Artur's posts.


However, to share information with others in need, solution is simple:

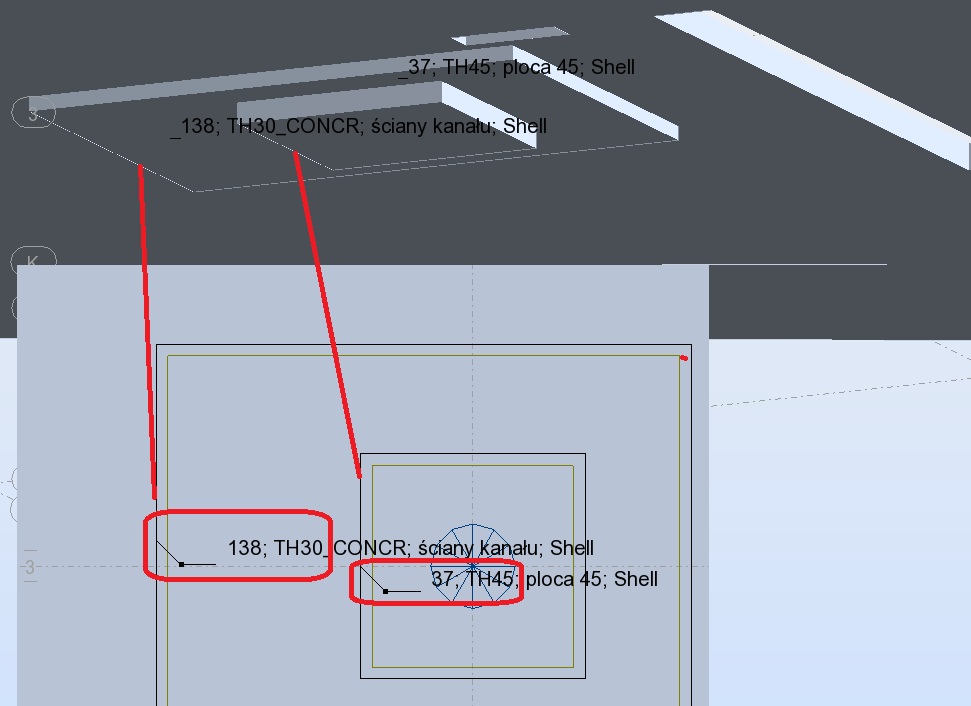
If you need another type of panel thickness within one panel type, you just draw it like you draw oppening.

As Rafal says: "Properties of most inner panels are considered in such areas" (when generating FE mesh).


Smiley Happy

If this solved your issue, please Accept it as Solution help other forum users with similar issues to find answers easily.
  
Mirko Jurcevic


My blog: www.engipedia.com
Try my Revit add-ins: Autodesk App Store
0 Likes
Message 13 of 13

Rafal.Gaweda
Autodesk Support
Autodesk Support

Screen shot to above post


path.jpg


Rafal Gaweda