Spherical 3D pocket

Spherical 3D pocket

SGoldthwaite
Collaborator Collaborator
1,195 Views
4 Replies
Message 1 of 5

Spherical 3D pocket

SGoldthwaite
Collaborator
Collaborator
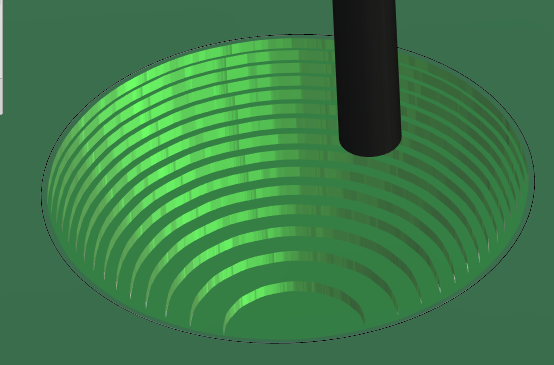
I'm trying to mill a spherical pocket.  First step I'm using 3D adaptive clearing with a 1/4" flat end mill.  Second step is a finishing pass and I'm using a scallop operation with 1/8" ball end mill  In the 1/4" end mill operation I set stock to leave as 0.01".  But when I go in with the scallop operation, there's a lot more then 0.01", it's closer to 1/8"

Attached is my Fusion 360.  There are two spherical pockets, I've only tried milling the large one.  I assume the small one will have the same issue.
0 Likes
1,196 Views
4 Replies
Replies (4)
Message 2 of 5

jeff.walters
Advisor
Advisor
I see 2 things that are causing the issue the first is that your using a flat bottom mill. While you can and it’s not necessarily wrong it would be better if you used a bull mill. But the major (IMHO) issue is that you’re using a large stepover with a shallow depth of cut. Adaptive is designed to do just the opposite you want to use a small step over with a deep cut. With 1/4in tool I would recommend am optimal load of .05 to .062in and a maximum roughing stepdown of .5in.

The second part of the 3D adaptive is the fine stepdown.  Once the tool has cut what it can at the maximum roughing stepdown it will start stepping up the fine stepdown amount and cut what it can at that depth. So I would recommend .02-.03in for the fine stepdown. The results will be more like what I think you’re looking for.
Jeff Walters
Senior Support Engineer, CAM
0 Likes
Message 3 of 5

SGoldthwaite
Collaborator
Collaborator
Thanks Jeff.  I'm using the 1/4" flat end mill because I don't have a bull or round nose, but I ordered a 1/4" round nose end mill and should have it in a few days.  I didn't mention in my post that I'm cutting wood, so I can take a much larger load 0.062". 

My first try with this I kept a lot of the defaults and noticed it roughed out the part then went in with the fine cuts.  I didn't want it to do that part since that's what the 1/8" round nose operation would do.  Sounds like I should just do it all in one 2D adaptive clearing operation when my 1/4" round nose bit arrives. 

Also, when I went to setup the scallop operation, there were a lot of settings in the geometry tab I didn't understand.  Do you know where I can go to get a good explanation of them?

Thanks again for your help.

0 Likes
Message 4 of 5

Laurens-3DTechDraw
Mentor
Mentor
SGoldthwaite wrote:

My first try with this I kept a lot of the defaults and noticed it roughed out the part then went in with the fine cuts.  I didn't want it to do that part since that's what the 1/8" round nose operation would do.  Sounds like I should just do it all in one 2D adaptive clearing operation when my 1/4" round nose bit arrives. 

Also, when I went to setup the scallop operation, there were a lot of settings in the geometry tab I didn't understand.  Do you know where I can go to get a good explanation of them?

Thanks again for your help.


Actually you want a 3D Adaptive and not 2D.

I think this helps: http://knowledge.autodesk.com/search-result/caas/CloudHelp/cloudhelp/2015/ENU/Inventor-HSM/files/GUID-78C4C199-A42F-4D56-B397-EBD6FD4E0957-htm.html

Laurens Wijnschenk
3DTechDraw

AutoDesk CAM user & Post editor.
René for Legend.


0 Likes
Message 5 of 5

SGoldthwaite
Collaborator
Collaborator
Laurens-3DTechDraw wrote:

Actually you want a 3D Adaptive and not 2D.


Your right, I meant 3D. 
0 Likes